As much as I love the feeling of late fall in the garden, and all the scrumptious flavors that come part and parcel with the season, there’s one thing I absolutely dread when the chill in the air gets impossible to ignore.
I supremely hate saying goodbye to my tender annuals.
Now I’m not in the habit of using the word hate too often, but in this case, I really do dread losing such beloved garden companions.
For some, such as marigolds, celosia and calendula, there’s no other choice but to say thanks and so long!
But for my favorite annuals, the tender pelargonium geraniums, there’s no need to say goodbye just yet. I have successfully overwintered geraniums indoors and have managed to keep some plants going for years.
But Mickey, I thought geraniums were perennials!
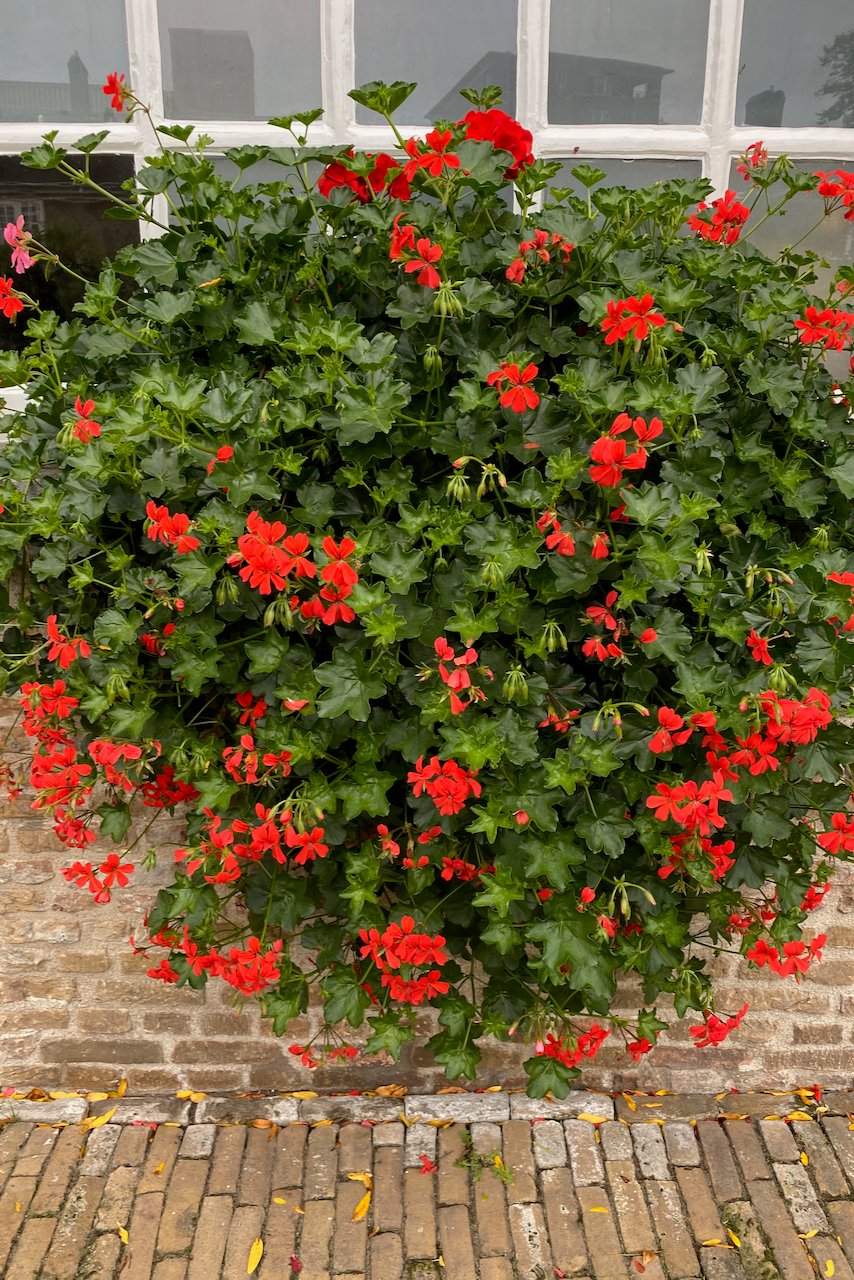
Yes, some geranium geraniums are perennial. But now we’re talking about pelargonium geraniums, also known as storksbill geraniums. They are generally tender annuals or half-hardy, depending on what gardening zone you’re in.
It’s easy to tell the two types apart if you look at the flowers. The flowers of tender geraniums have five petals arranged as two upper petals and three lower, smaller petals. The flowers of perennial geraniums also have five petals, but they’ll always be symmetrical and of the same size.
I’ll walk you through three ways we can overwinter pelargonium geraniums before the frost takes its geranium toll. Yes, I have used all of these methods in the past, but I can tell you right now that the last one I’m describing is better left to the detail-oriented, fearless gardener.
1. Easy mode: Turn your geraniums into houseplants.
The gist of it: We can simply bring our tender pelargoniums indoors and treat them as temporary houseplants for a few months.
How to overwinter geraniums as houseplants.
The whole purpose of bringing tender geraniums indoors is to trick them into thinking winter never happened. (Honestly, if humans could take a winter-long nap and wake up refreshed and ready to go in spring, I’d be the first to sign up!)
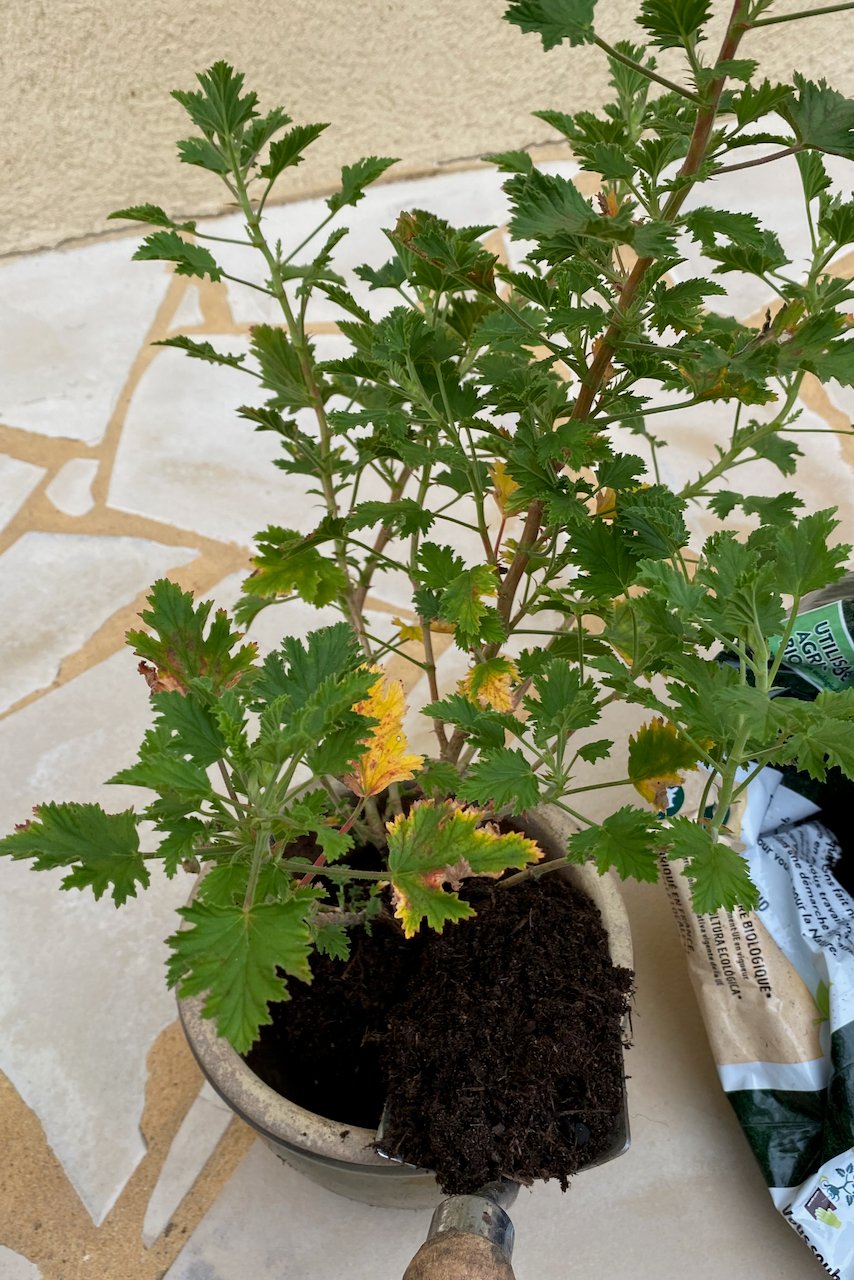
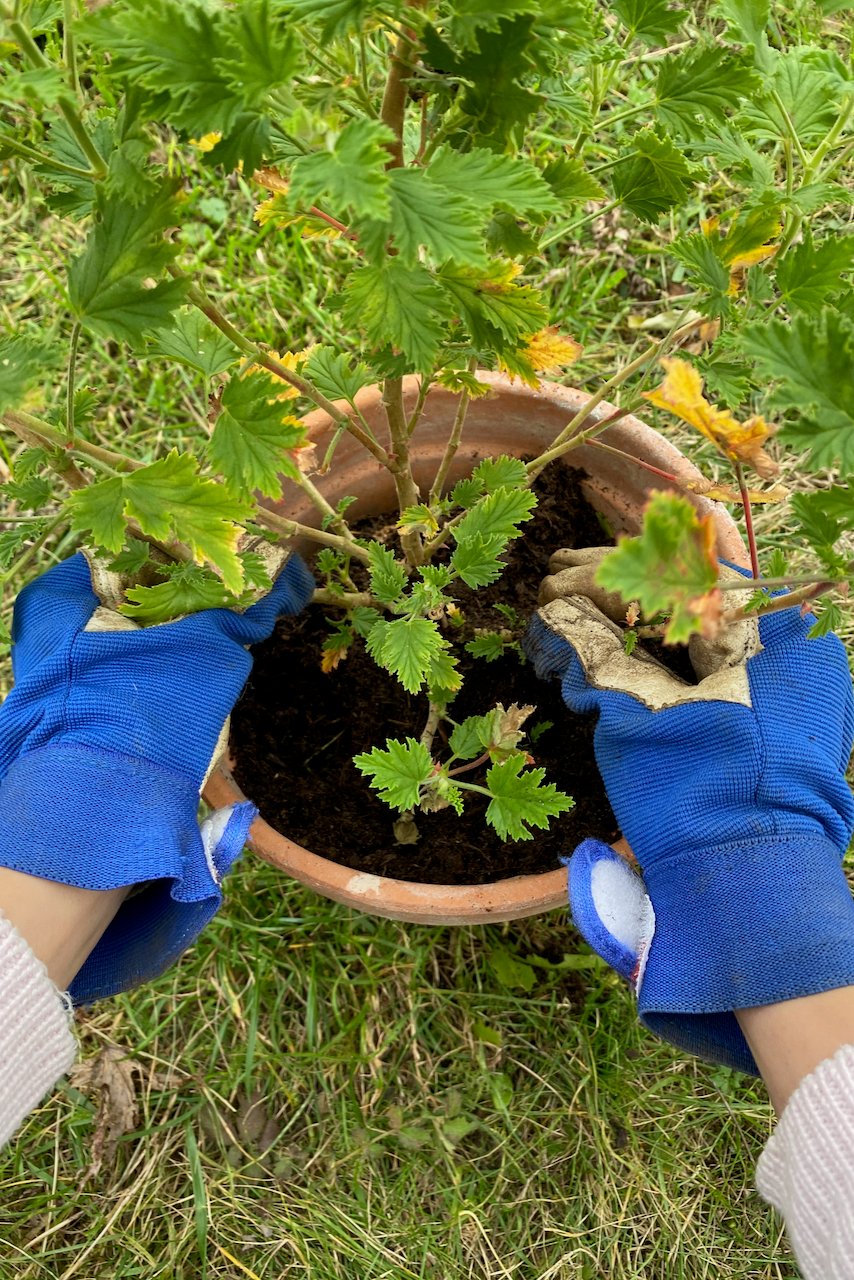
There is a caveat, though. Every single time I brought in garden plants without changing the potting soil, things did not work out well for anyone involved. If you’re growing pelargoniums in the ground, you need to dig them out completely, clean the roots really well and repot the whole plant in a size-appropriate pot with fresh potting soil.
But here’s the trick.
Even though this is a garden plant, remember to use a potting soil mix specifically meant for houseplants. It has the right amount of nutrients and moisture retention for plants that are meant to stay indoors, not watered by rain, and hopefully not inhabited by worms.
Once the pelargoniums are freshly replanted into their temporary home, place the pot in a sunny window – as much light as you can get in the winter. If you have a bonus room (a sunroom, a conservatory or even a garage or basement that has windows), even better. The caveat is that the rooms need to stay above 40F in the winter.
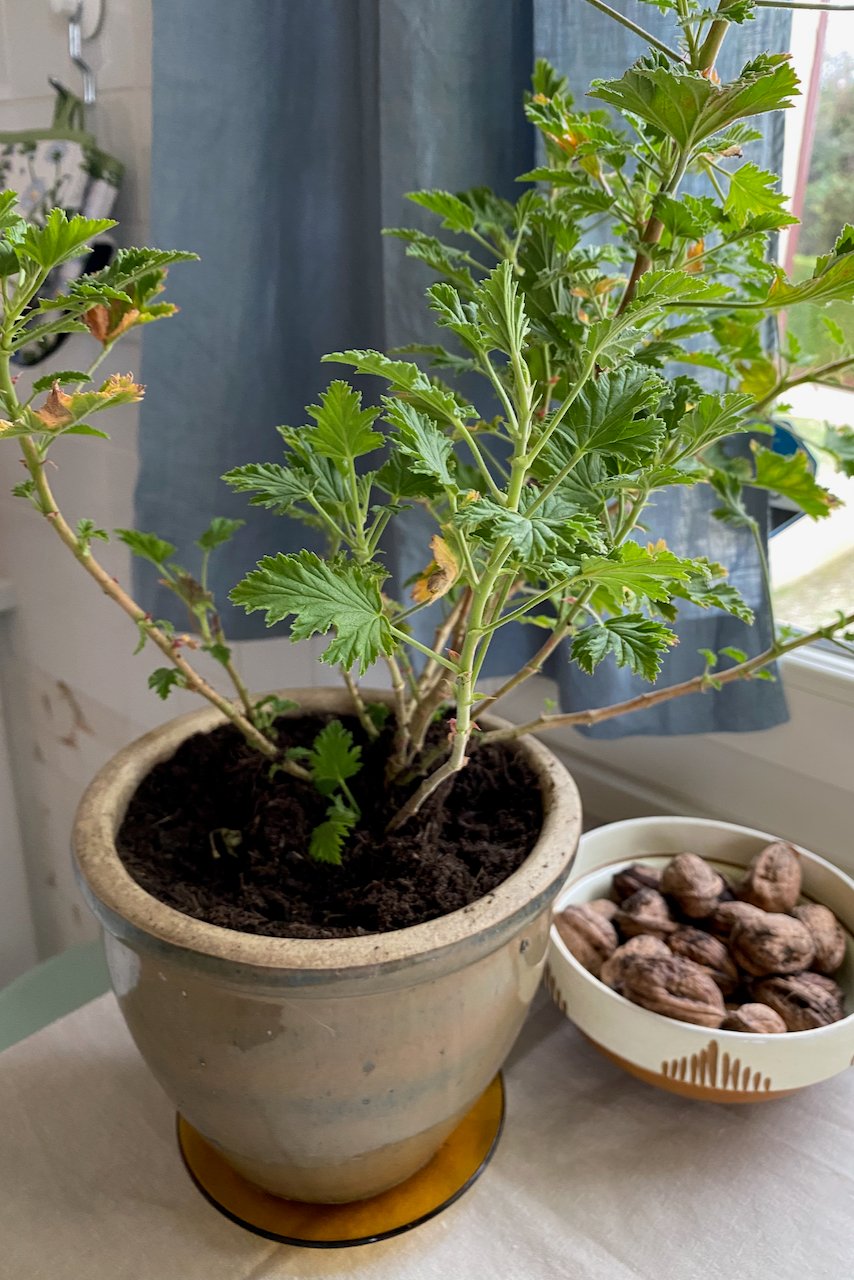
Keep watering your indoor pelargoniums as you would houseplants, keeping in mind that you’ll have to reduce watering in the winter. Keep the pots away from sources of heat (no fireplace mantlepiece decor here) and any other sources of direct draft.
Indoor pelargoniums will probably not bloom during the winter, but as long as you keep them ticking along, they’ll bloom much earlier in spring.
Can I take potted geraniums straight indoors?
Now, if you’re like me and you keep your tender geraniums in containers all summer long, you might be tempted to skip the repotting step. It’s already in a pot, right? Let’s just bring it in.
Understandable. I skipped it too a couple of times. The result in year one was an aphid infestation that traveled to the houseplants sharing a table with the geraniums.
The other time, I found slugs on my windowsills that had hitchhiked as eggs tucked in the pots. Both times, I thought I had done a thorough inspection. Both times I was wrong.
I now think that it’s worth taking the extra time and effort to repot any plants that turn from garden plants to houseplants, even if for a season.
While we’re at it, here’s an article I wrote about other garden plants that we can upgrade to houseplants.
Any cons to this geranium overwintering method?
In my living room, there’s only so much space to dedicate to plants. I have enough space next to the windows for about three extra pots, in addition to the regular houseplant tenants of this place.
So space limitation is the biggest disadvantage for me, especially in a season where the whole family (and our collective hobbies) are stuck indoors.
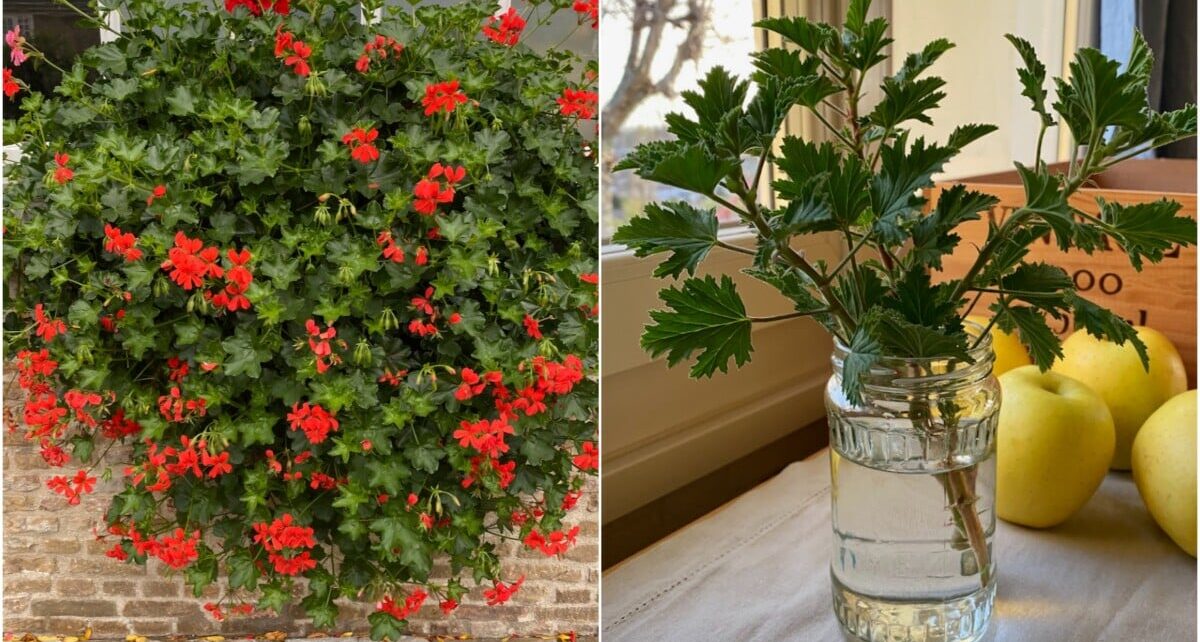
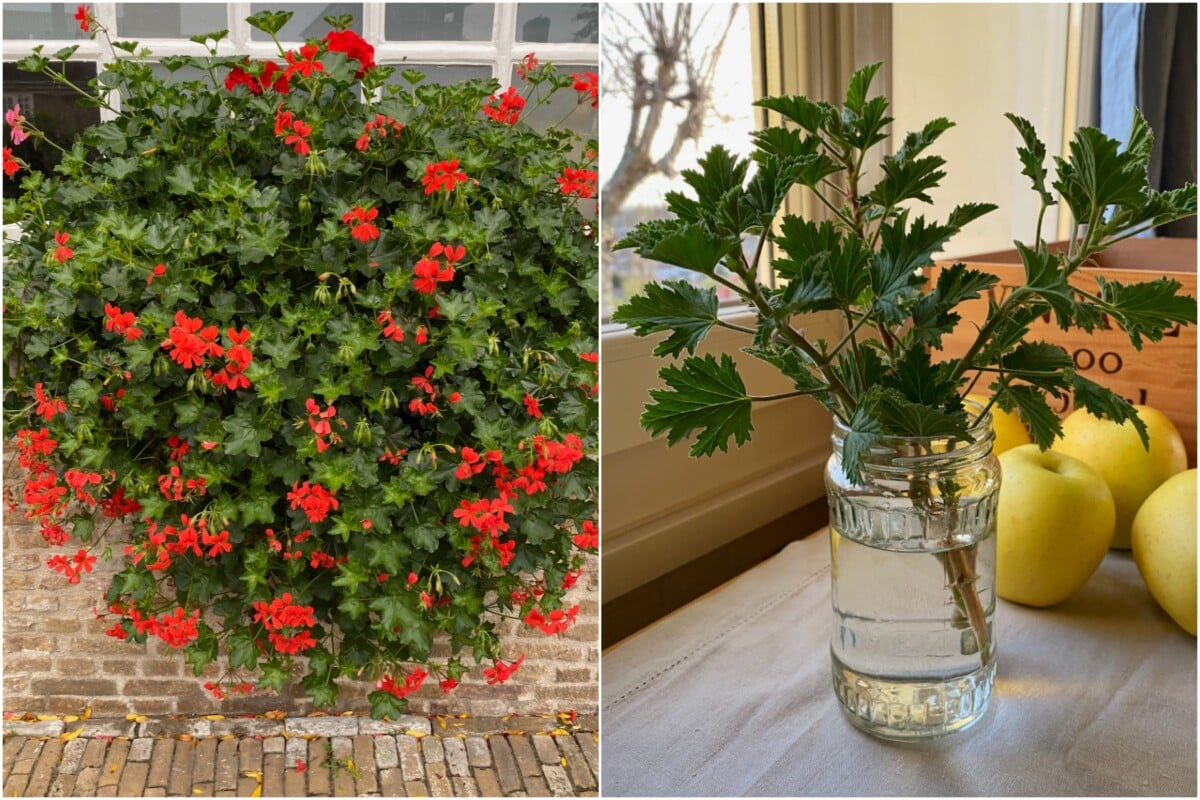
The gist of it: We leave the mother-plant in the ground to die (dramatic, I know). Next spring, we will use the cuttings to restart our geranium garden.
The advantage of this method of overwintering geraniums.
The main reason why I would choose and recommend this method is that it takes up way less space. This is especially convenient if you have a large geranium collection, but no room to fit them all indoors. (I had this exact dilemma when I used to live in a small apartment with a large-ish balcony full of plants.)
If we’re just taking cuttings, we only have to find enough room to house a jar of them rather than several containers with mature plants. As an added bonus, I don’t have to put in the time and effort pulling out and repotting geraniums while everyone else is tucking into my Thanksgiving green bean casserole (it’s been known to happen).
How to overwinter geraniums as cuttings.
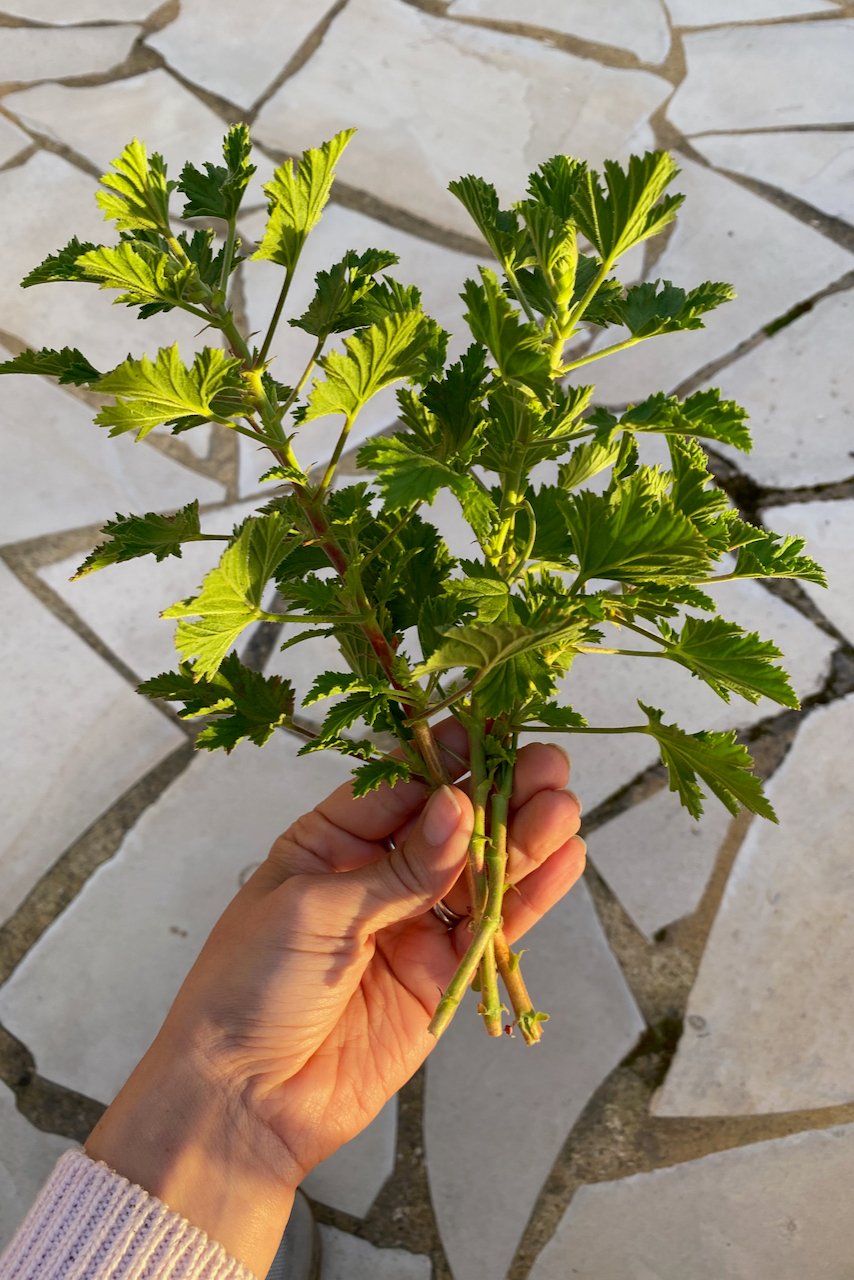
We have to select healthy vigorous stems and cut them off the main plant. Cut right below a leaf node. The length of the cutting depends on the type of pelargonium you’re growing, but I found that anywhere between five and ten inches works.
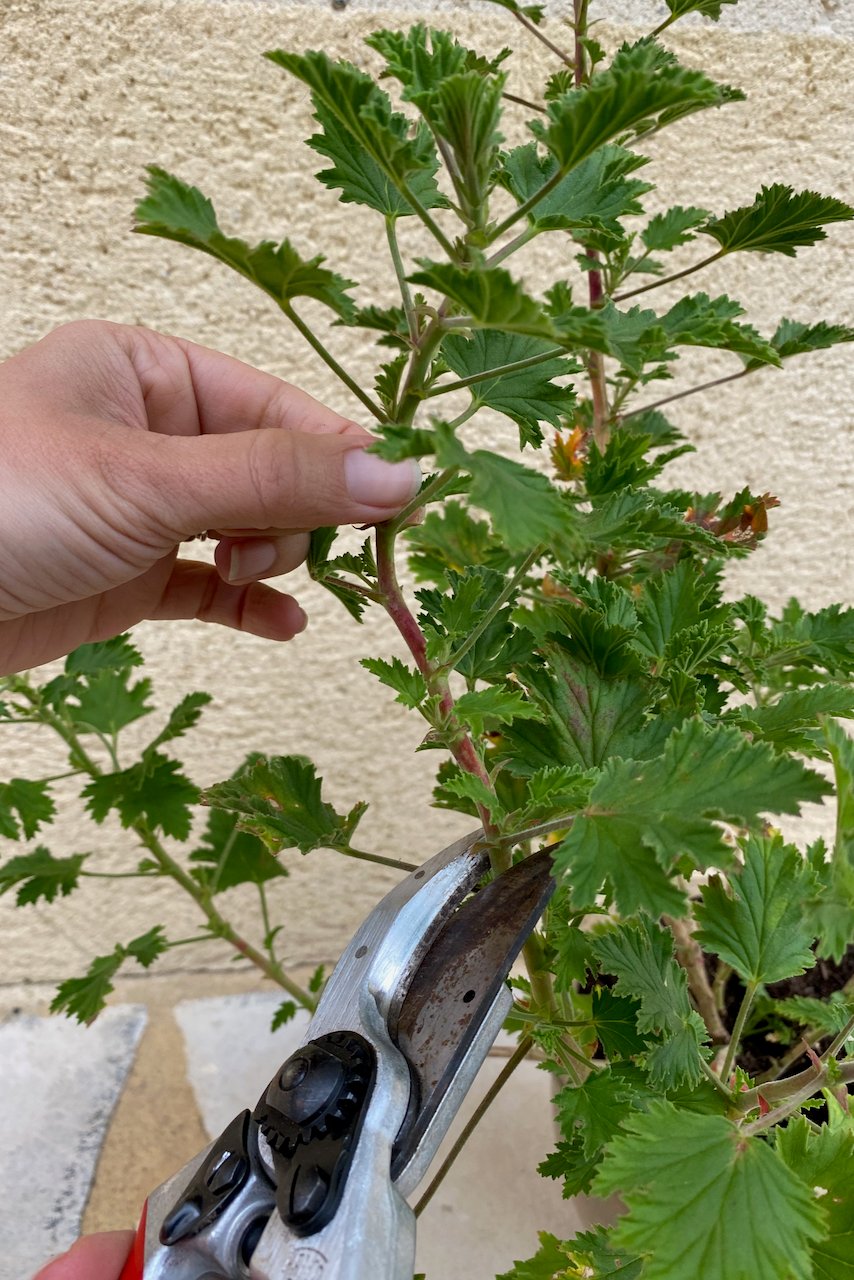
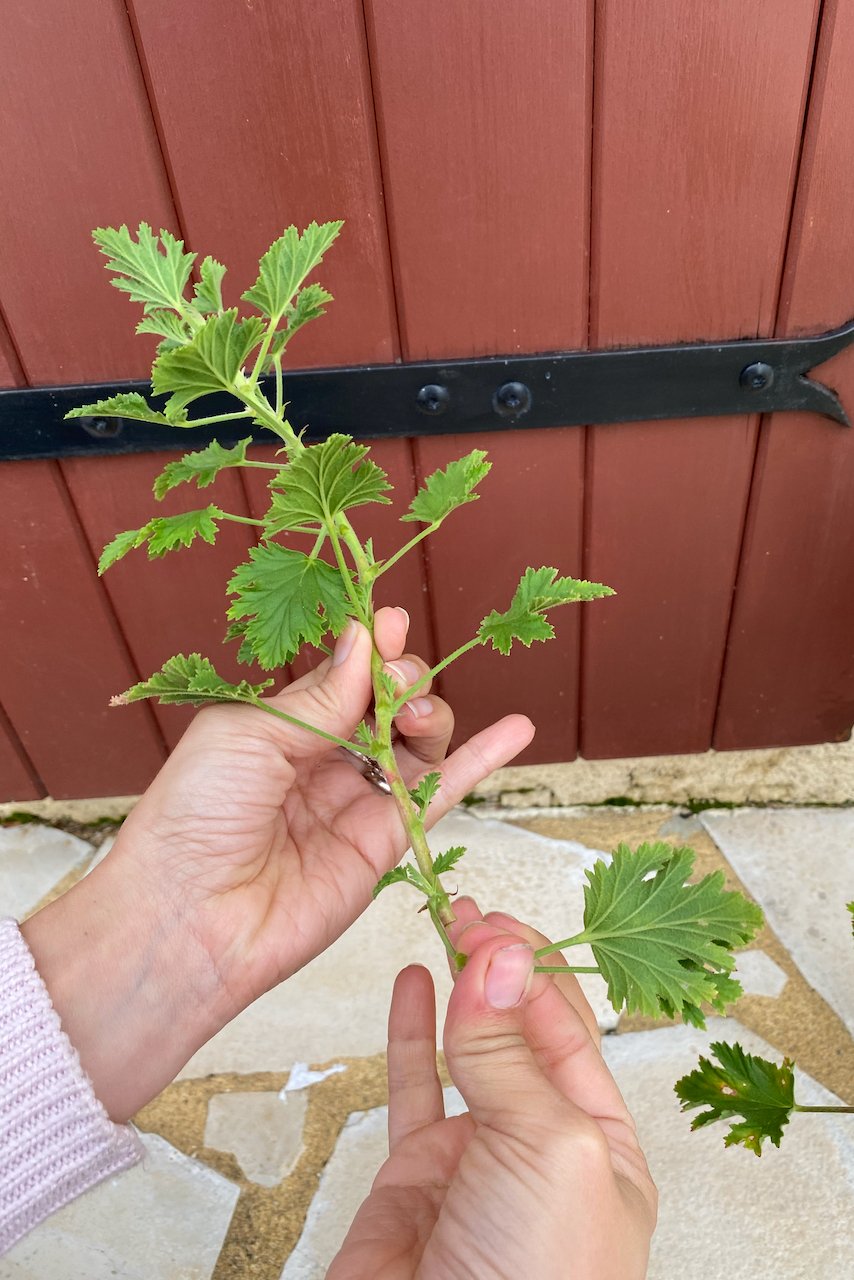
What I’m more interested in is making sure I have at least a couple of leaf nodes to submerge under water.
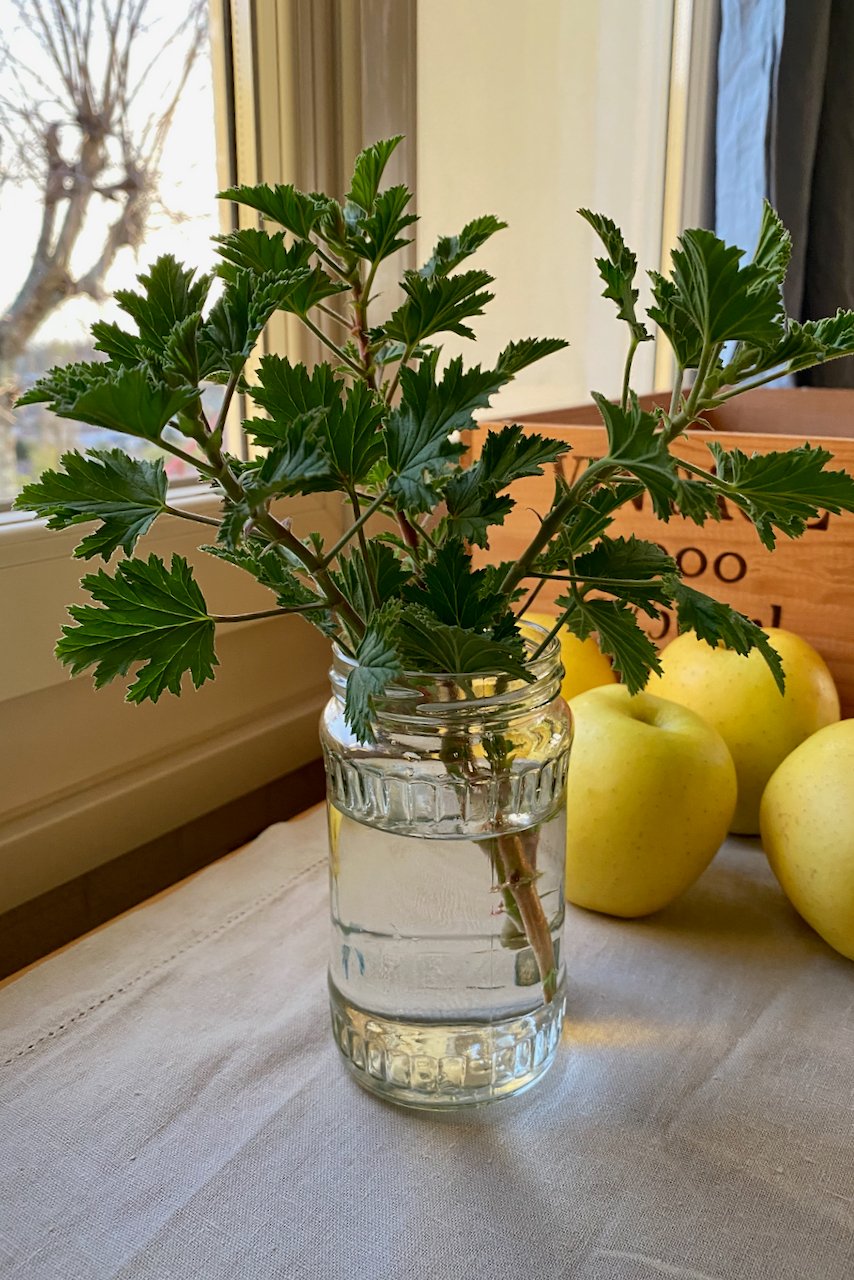
Then I remove the leaves from these lower leaf nodes and plop the stems into a jar (or several) of water. Just like potted geraniums, the cuttings will also need plenty of natural light.
Then every couple of weeks, I wash the jar and refresh the water. You could go longer in a colder room, but it might start to get a bit slimy.
After about a month to a month and a half, you’ll start noticing young roots developing in the jar. That’s a good sign! It means your plant is alive and growing. Now, there are at least three more months of taking care of it before it’s ready to go back outside.
At this point, some gardeners transplant the rooted cuttings into a pot full of soil and treat the geranium as a houseplant, much like we did in Method 1.
Personally, I don’t see the point of this intermediate step. I think it would negate all the advantages of taking cuttings.
In addition, when we put freshly rooted cuttings into soil, we also have to get the right balance between keeping the soil in the pot wet enough to keep the tiny rootlets alive, but not too soggy, so they don’t rot. Too much of a hassle for me in the winter.
Keep the cuttings in water, I say!
Any cons to this method of overwintering pelargoniums?
Of course, there are some downsides to this method. When we’re planting out the cuttings in spring, they’ll only be young plants and will act accordingly. They’ll first put their energy into growing and only then will they start blooming.
Another risk is that not all cuttings “take” (aka develop roots). So we take extra cuttings to hedge our bets.
Will the plant that I take cuttings from survive outside?
Honestly, it’s anyone’s guess.
No, if you get prolonged periods of hard frost, the geranium you left behind in the garden will not survive. Let’s remember that tender geraniums (pelargoniums) are native to South Africa, so it’s a given that they can’t withstand winter frost. If your winter is mild enough, they might make it. But my advice is to take the cuttings, just in case.
You could also give the Method 3 treatment to the plant you left outside (more on that below).
3. Hard mode: Overwinter geraniums as dormant bare roots.
The gist of it: This is basically the opposite of Method 1 that I described above. We’re pulling our geraniums out of the ground in order to trick them into winter dormancy.
If you’d like to learn more about bare root planting, here’s a link to a guide I wrote on how and when it makes sense to start plants from bare roots.
How to do it:
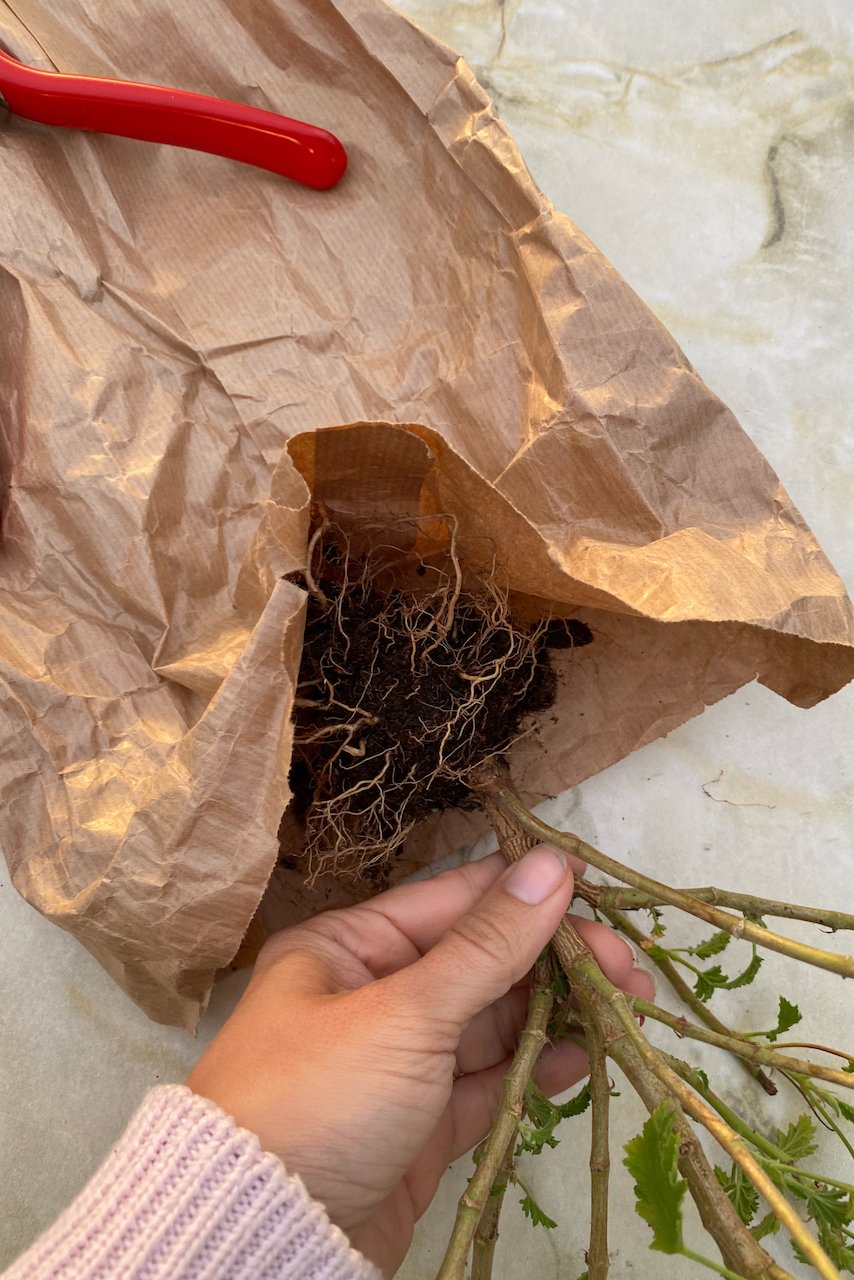
Obviously, we’ll be digging out our geraniums. Pull them out of the ground gently, digging around the root ball. Then shake off the excess soil, but be gentle with the fragile root system.

You can wash the roots, if necessary, but I shake them as well as I can and leave it at that. If you do wash the roots, you have to let them dry before putting them into storage.
We can either keep the entire plant as it is, or we can cut a third or two-thirds off the top to save on space.
And you know what we can do with the healthy stems that we’re trimming off? No? Have a look at Method 2 above and turn them into cuttings.

My great-aunt – the one member of the family who had the most amazing garden – used to store her pelargonium geraniums hanging from the rafters of her barn. The geranium smell in that place in the winter was very strong, but that might have had something to do with the heirloom pelargoniums she was collecting back in the 90s.
I have neither a barn nor rafters, so I’ve taken to overwintering bare roots on a shelf in my garage or hanging from the top of the stairs in the basement. Both places stay cool without freezing and dark without being too humid.

The best way to store pelargoniums is by hanging them upside down in a dry and dark place that stays cool, ideally anywhere between 40F and 60F (that’s 5 to 15C).
We can just hang the roots upside down (meaning root side up) as they are, but I prefer to put them in a paper bag. This little bit of extra protection keeps the moisture in the roots a bit longer while still allowing air flow.
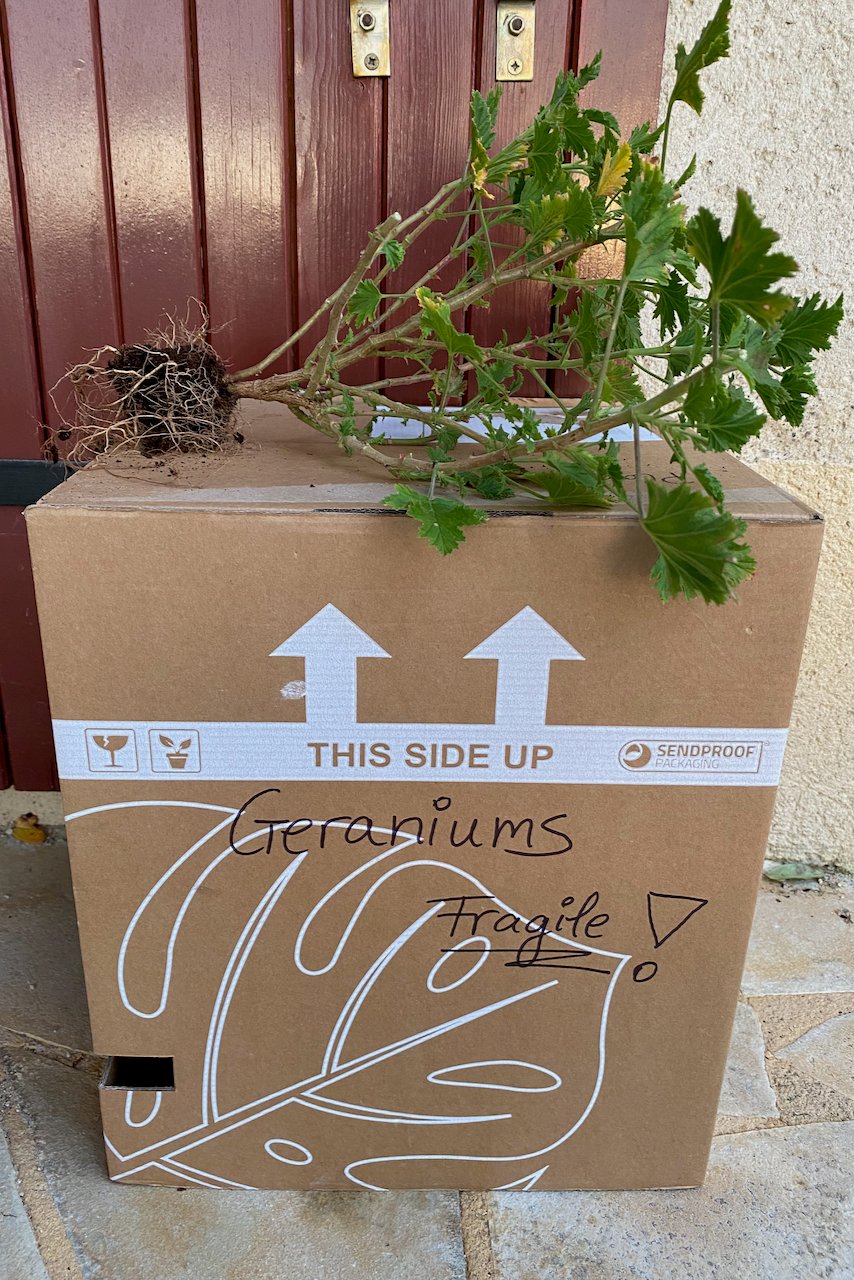
If you don’t have any hanging space, storing the pelargoniums in a cardboard box also works well. Keep the box unsealed and label it to make sure you don’t accidentally put something heavy on top of it.
Any cons to this method of overwintering geraniums?
To my frazzled mind, the major disadvantage of this method is having to remember to check in on the bare roots now and then. If the roots dry out too much, they’ll no longer be viable next year. So we still have to do a bit of maintenance in the winter, especially if we’re storing them in a place that gets too much drying draft.
I check on them periodically, about once a month or so, and if the roots look too dry and brittle, I soak them in water for about an hour, let them dry up again and then put them back in the box. This also gives me the chance to dispose of any dry leaves (they will dry!) or moldy parts.
I know that this may seem like a lot of information, especially if this is your first time overwintering tender plants indoors. My advice is to give it a try. Try a couple of methods – either houseplant + cuttings or cuttings + bare roots – and see what works for your gardening style and your home.

Get the famous Rural Sprout newsletter delivered to your inbox.
Join the 50,000+ gardeners who get timely gardening tutorials, tips and tasks delivered direct to their inbox.