In temperate climates, native plants take their cues from the changing seasons. Shorter days and cooler nights signal to plants it’s time to finish producing seed.
Each plant is capable of dispersing anywhere from hundreds to thousands of seeds, but very few will take root. Only the seeds that aren’t eaten or outcompeted by other plants – AND happen to land in a suitably, moist, fertile, and sunny spot – can eventually sprout in spring.
Naturally, the success rate is very low. A plant that scatters 1000 seeds may only result in one or two surviving to become mature plants.
Most winter-hardy perennials have seeds encased in a hard protective coating to increase the odds of successful reproduction. This tough outer layer prevents seeds from prematurely sprouting during a brief warm spell in winter, only to be killed when freezing temperatures return.
In order to germinate, these seeds must pass through a cycle of moist – cold – freezing – cold – moist conditions. The seasonal weathering of the seed coat from fall through winter to spring softens the outer casing. When temperatures and day length are just right, the seeds will break dormancy and sprout.
To recreate the seasonal treatment of native seeds, growers can use a little process called cold moist stratification (CMS).
More often than not, seeds of wildflowers, prairie grasses, shrubs and trees from winter climates will need a period of cold moisture to grow successfully. The list is quite long – milkweeds, coneflowers, columbines, bluestems, maples, redbud, yarrow, and several species of aster are some seeds that require cold treatment to sprout.
Usually the seed packet will tell you whether cold moist stratification is required and the number of cold days needed for germination. Most flowering perennials need a minimum of 30 or 60 days, while woody plants like shrubs and trees tend to need 90 or 120 days.
Some perennials – like New England Aster – don’t require CMS to sprout but will have much higher germination rates when given the cold-moist treatment.
Other winter-sowable seeds include:
- Cold-hardy herbs such as oregano, thyme, parsley, and chives
- Cool-season crops like lettuce, kale, and spinach
3 Basic Ways to Achieve Cold Moist Stratification:
1. Sow seeds outside in the fall
The easiest cold treatment for seeds – but also the least effective – is by letting the changing seasons naturally weather the seed. To increase the odds of success, you’ll need to broadcast copious amounts of seed. It’s the least controlled way to do it, and your seedlings will have zero protection from animals.
2. Moisten seeds and refrigerate
This method requires placing seeds in a moistened paper towel or sand and sealing it up in the fridge for the given number of days. It has a much better success rate than fall sowing because there is more control over the growing environment, but you will be limited by the space available in your fridge. You’ll need to set reminders to keep on top of the CMS schedule.
When seeds are ready, they are potted up and set under grow lights indoors until the last frost. They will require hardening off before you can plant them outdoors.
3. Winter sowing

The best of both worlds, winter sowing involves planting seeds in covered containers and setting them outdoors over winter to sprout when the time comes in spring. This technique takes advantage of naturally occurring seasonal changes to ready the seed coat for germination, while also giving the grower excellent control over the growing environment and protection from scavenging critters.
7 Benefits of Winter Sowing

1. It’s easy
With just a few rules to follow, winter sowing only requires clear or translucent containers with added drainage and air ventilation holes, about 2 to 3 months of winter, and a place outside in deep shade.
Other than that, there are tons of different ways to create your winter sowing setup:
- Milk jugs. With some modifications, translucent milk jugs are a popular choice of winter sowing container, but you can use any plastic recyclable with a lid, like clamshell cases, soda and juice bottles, salad boxes, and take-out trays. Then you sow directly inside the container and set it outside.
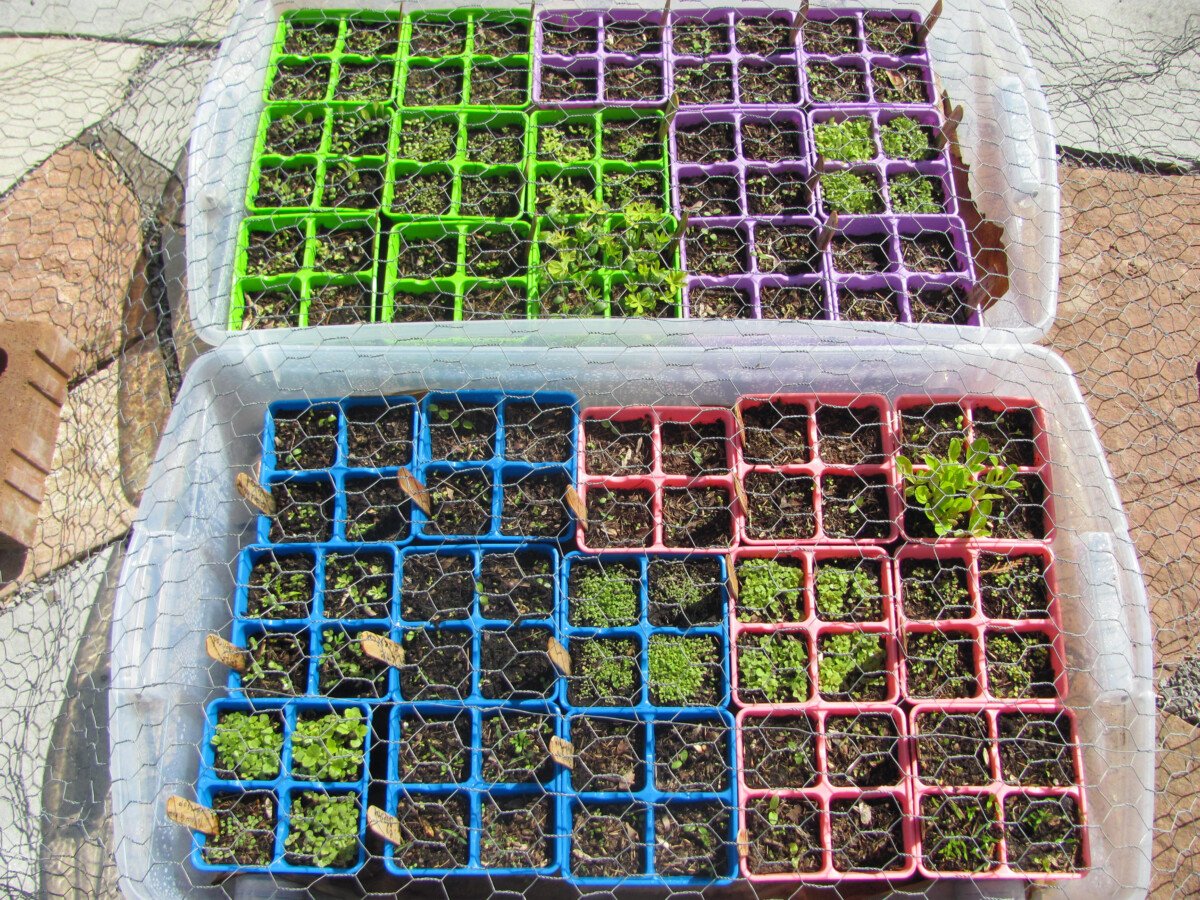
- Mini greenhouses. Another way to winter sow is to place plug trays or pots inside a plastic tote with a clear lid – as I’ll demonstrate below. Once holes are added, this setup becomes like a miniature greenhouse.
- Light boxes. Build wooden frames (or use an empty raised bed), place pots or flats inside, and cover the top with hardware cloth or chicken wire. Here’s an excellent light box example.
2. It’s inexpensive
Since you can reduce and reuse old containers or build ones from things you have around the home, you can get started winter sowing without spending much.
At a minimum, all you need are seeds and potting soil because all the good stuff happens outdoors.
Apart from the low startup costs, you can grow a huge number of plant species at once. And starting plants from seed will always be much cheaper than purchasing starter plants at the nursery. When you winter sow, it’ll cost you pennies per plant instead of dollars.
4. It’s efficient
You don’t need to plant 1000 seeds to get one plant in winter sowing. Since seeds and seedlings are covered, they won’t be disturbed by the elements or wildlife. More often than not, five winter-sown seeds will yield five seedlings.
5. It’s pretty passive
Once you’ve done the work of planting, covering, and placing outdoors, there’s not too much you need to do by way of maintenance until the weather warms in spring.
6. No hardening-off necessary
Another major benefit of winter sowing is that you don’t have to harden off plants to acclimate them in spring. There’s no need to haul plants outside, then inside, then outside for weeks on end. They are already acclimated to life outdoors.
7. It safeguards your seedlings
Winter sowing in covered containers will keep wildlife from eating your seeds or wee seedlings before they’ve had a chance to grow. If you’ve lost plants to birds, squirrels, rabbits, or deer in the past, this benefit is invaluable.
How to Winter Sow – Step By Step
Start winter sowing when it’s consistently cold outside. Any time from December to February is a good time to set covered containers outdoors, depending on the cold days needed. You can’t winter sow for too long, so put those plantings out for winter as early as possible.
I’ll be showing how to do it with plug trays inside a clear plastic tote. If you’re using milk jugs or another upcycled container, the basic winter sowing principles will be the same.
Step 1: Gather Your Materials
Before you get started with winter sowing, you’ll need:
- Clear or Translucent Containers
The most important thing about your winter sowing container is choosing something that lets in light. It must have a clear top.
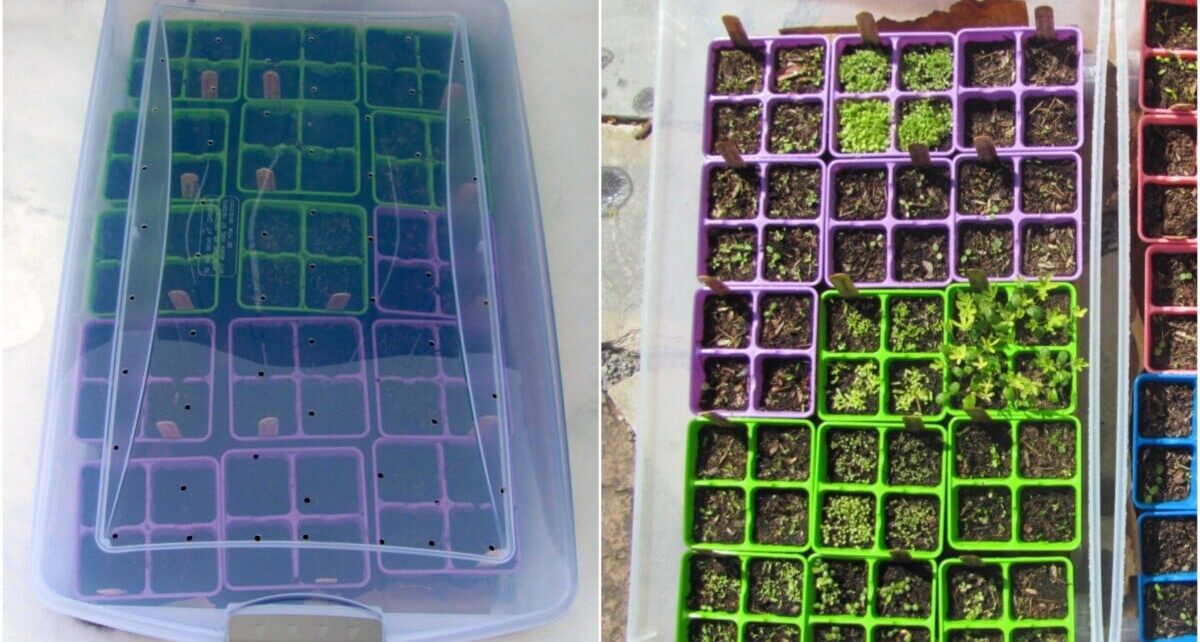
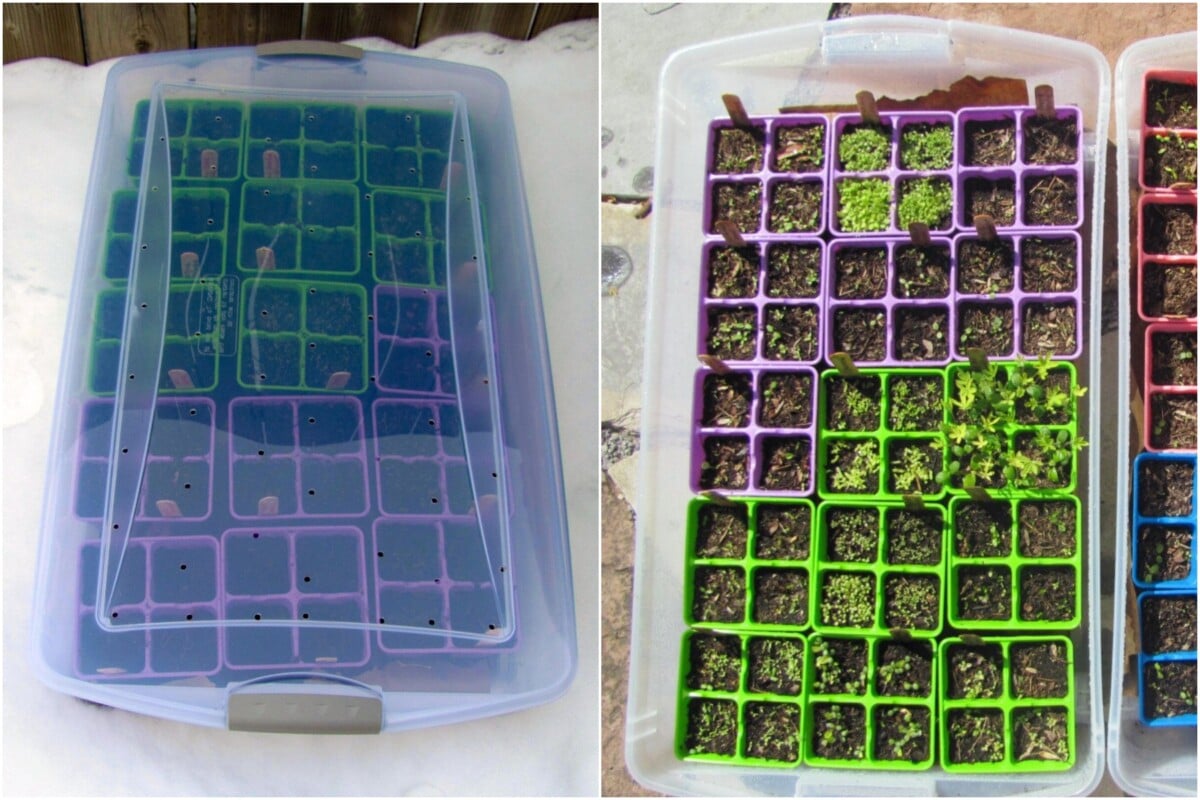
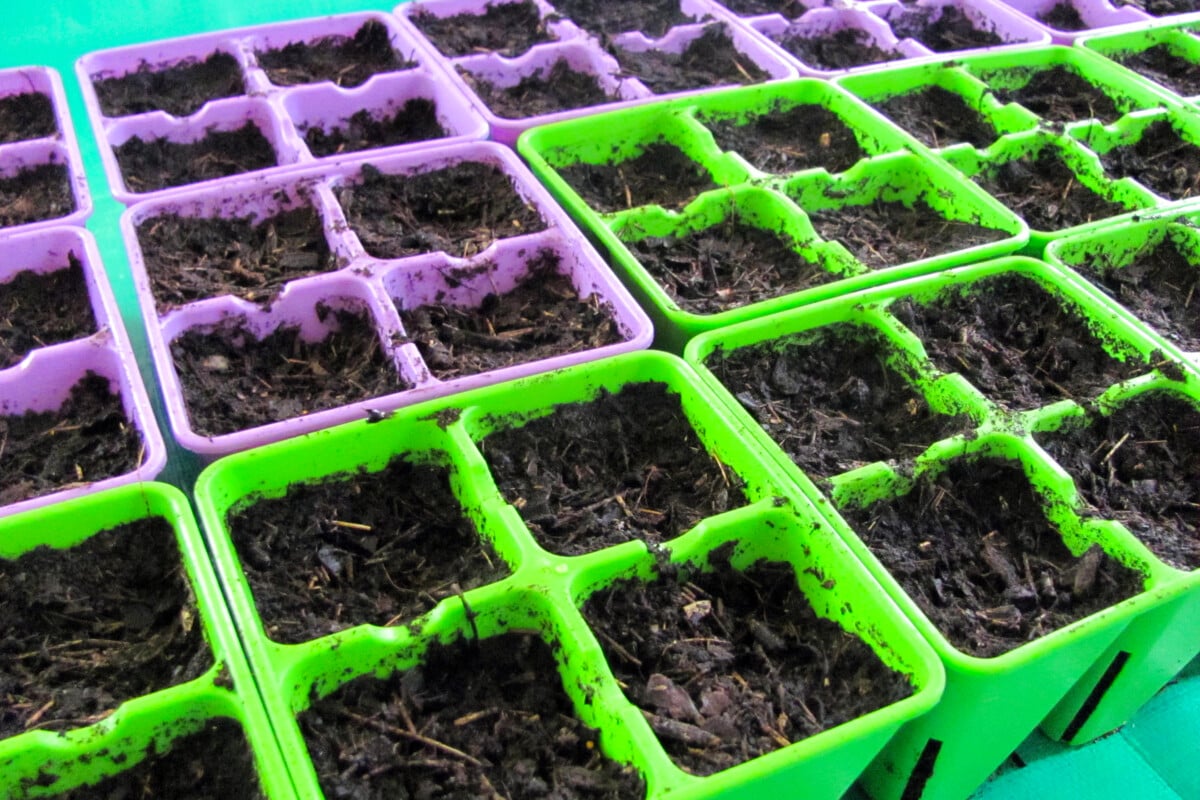
I have a clear plastic tote (originally an under-bed storage container) as my transparent outer container. The inside of the bin can be lined with pots, seed flats, or plug trays to keep plant species separated and organized.
The planting pots you use should hold at least 3 to 4 inches of soil. More soil depth will give seedlings the room to grow healthy and extensive root systems.

I’m using 4-cell plug trays, 4 inches deep. Each tote fits 15 trays for a total of 60 plugs per greenhouse.

Next you’ll need your potting media. This can be any seed starting mix or soilless mix to fill your containers. I, myself, am partial to leaf mold.
The key thing is that the growing media must drain well and retain moisture.
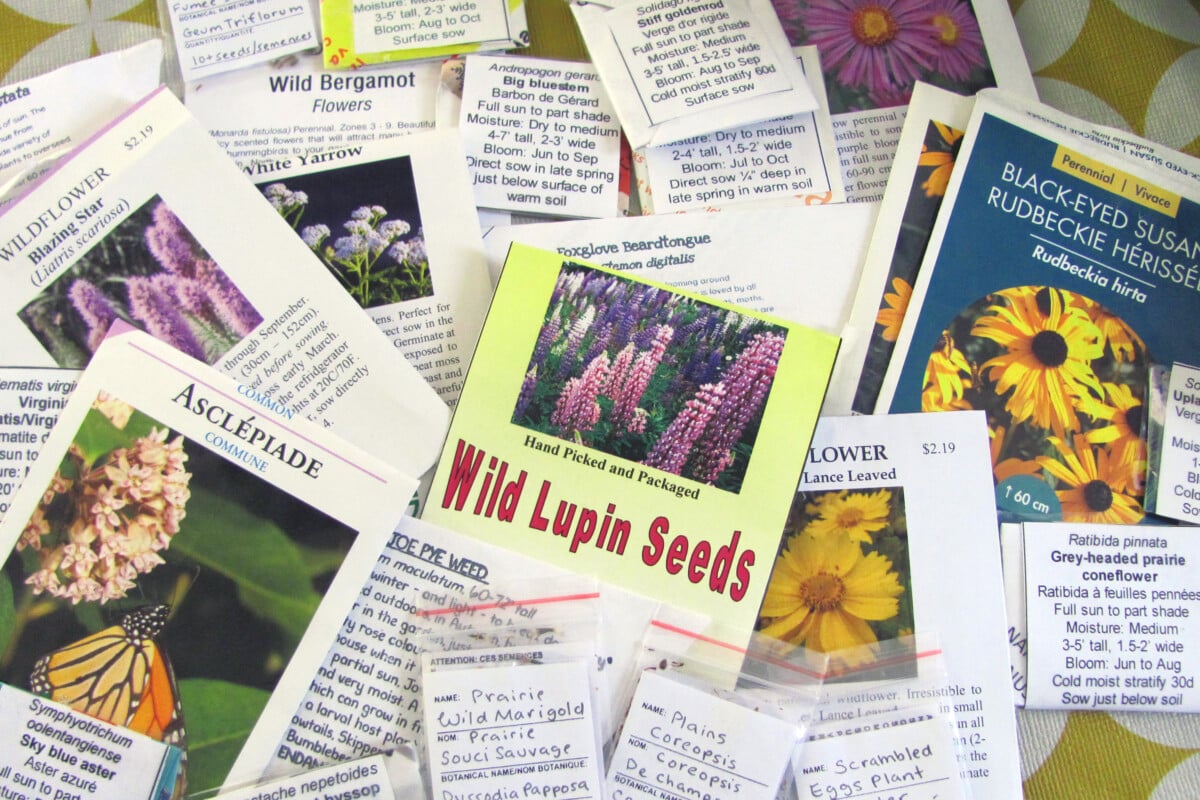
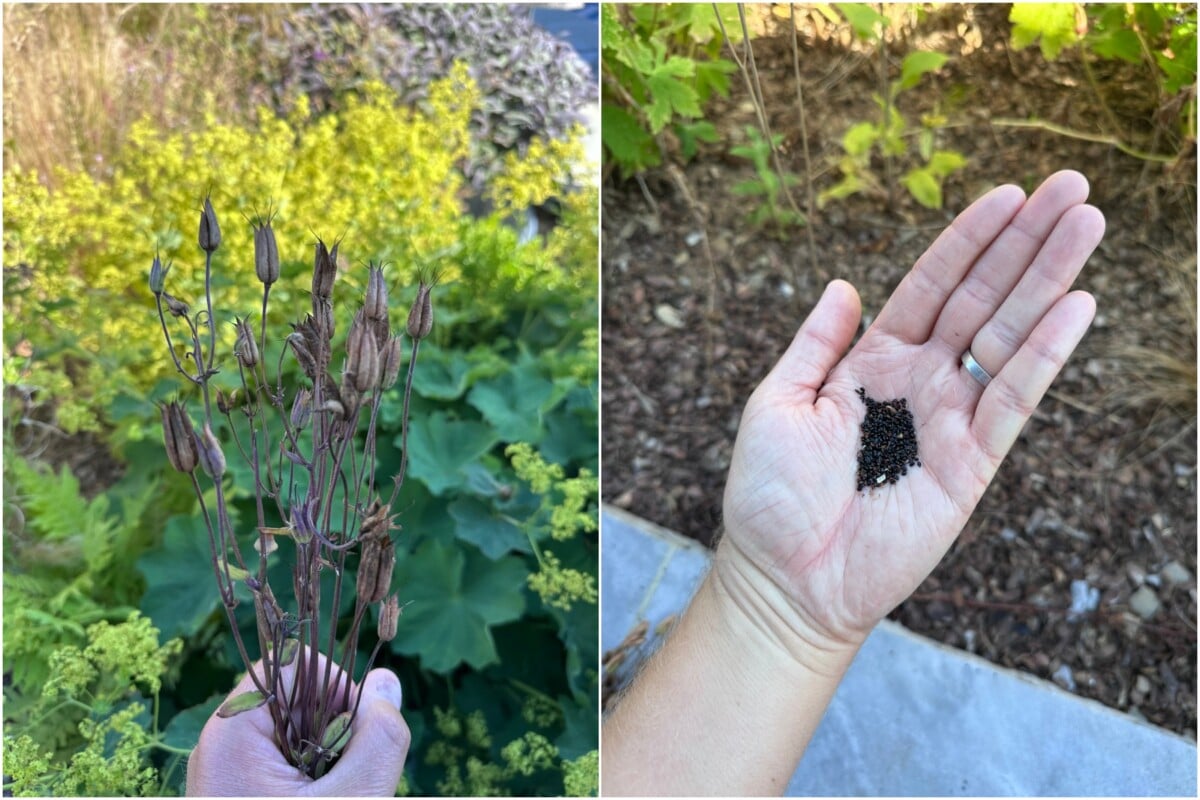
Gather up your trove of seeds. Winter sowing is an excellent way to start perennials, wildflowers, grasses, vines, shrubs, and trees. But don’t forgo winter sowing herbs, annuals, cool season crops, and leafy greens – it’s an easy way to get them started too.
Actually, the most challenging part of winter sowing is not going too overboard with the plant varieties.
- Labels and a Garden Marker
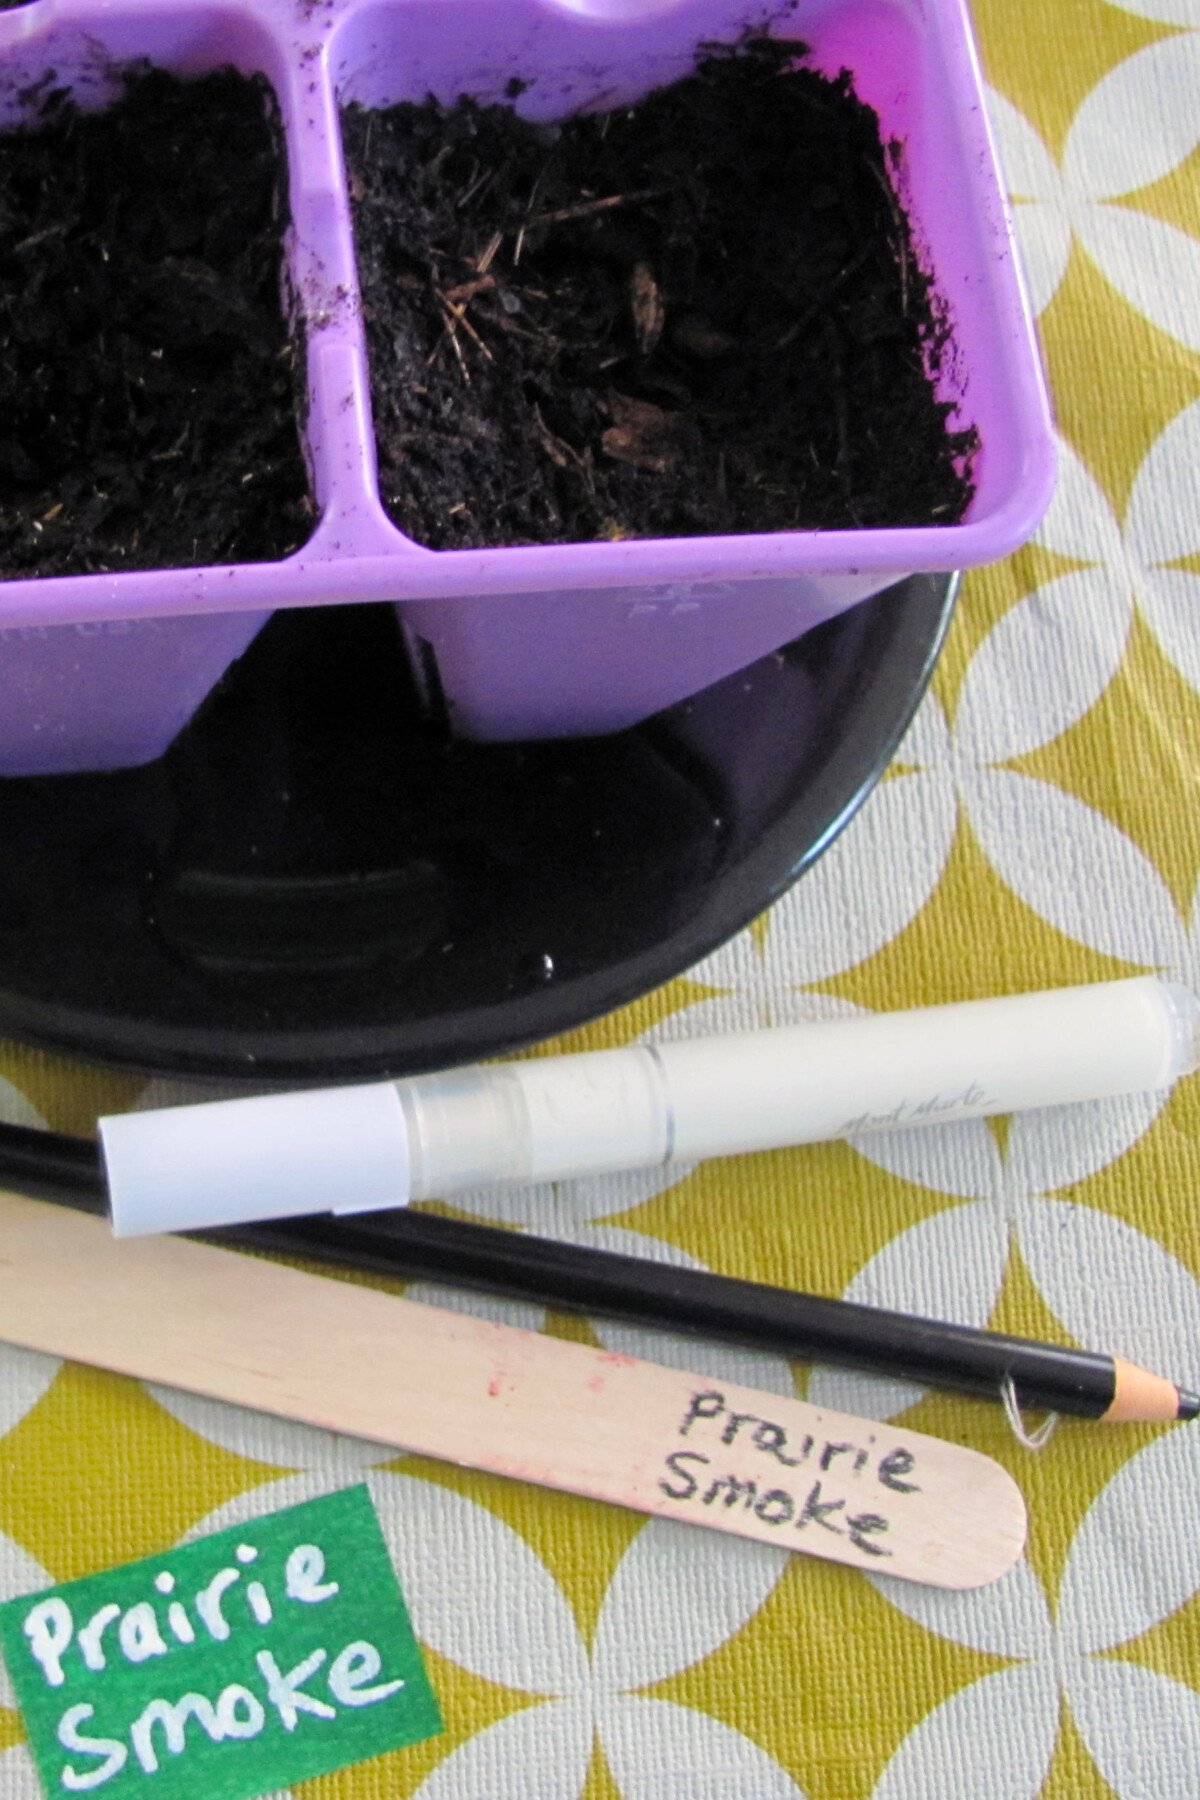
With winter sowing, it’s wisest to be redundant with your plant labels. Each container is doubled-up on tags – one you can stick into the soil inside the pot and another on the outside of the container.
For labels, use popsicle sticks, stickers, tape, or other plant tags you can scrounge up around the home.
Don’t write out your plant names in ink pens or permanent markers as these inks won’t last in the winter sun. Instead, use weatherproof writing implements that won’t get bleached in the sunlight or washed away in the rain. Good options are wax markers, paint pens, or specially-made garden pens that are water and UV-resistant.
Odds are you’ll need to modify your winter sowing containers with air and drainage holes.
Depending on the thickness of the plastic, you can use a drill, wood burning pen, soldering iron, scissors, or even a hot nail to puncture through. Harder plastics will require a more delicate touch to avoid cracking.
- Optional: Container Liner
It’s not totally necessary, but you can line the bottom of your greenhouse or milk jug with newspaper, coffee filters, or packing paper before adding seed flats or soil.
- Optional: Hardware Cloth or Chicken Wire
Having a wire mesh barrier around for spring is helpful for protecting your growing seedlings once the lids come off.
Step 2: Add Drainage and Vent Holes
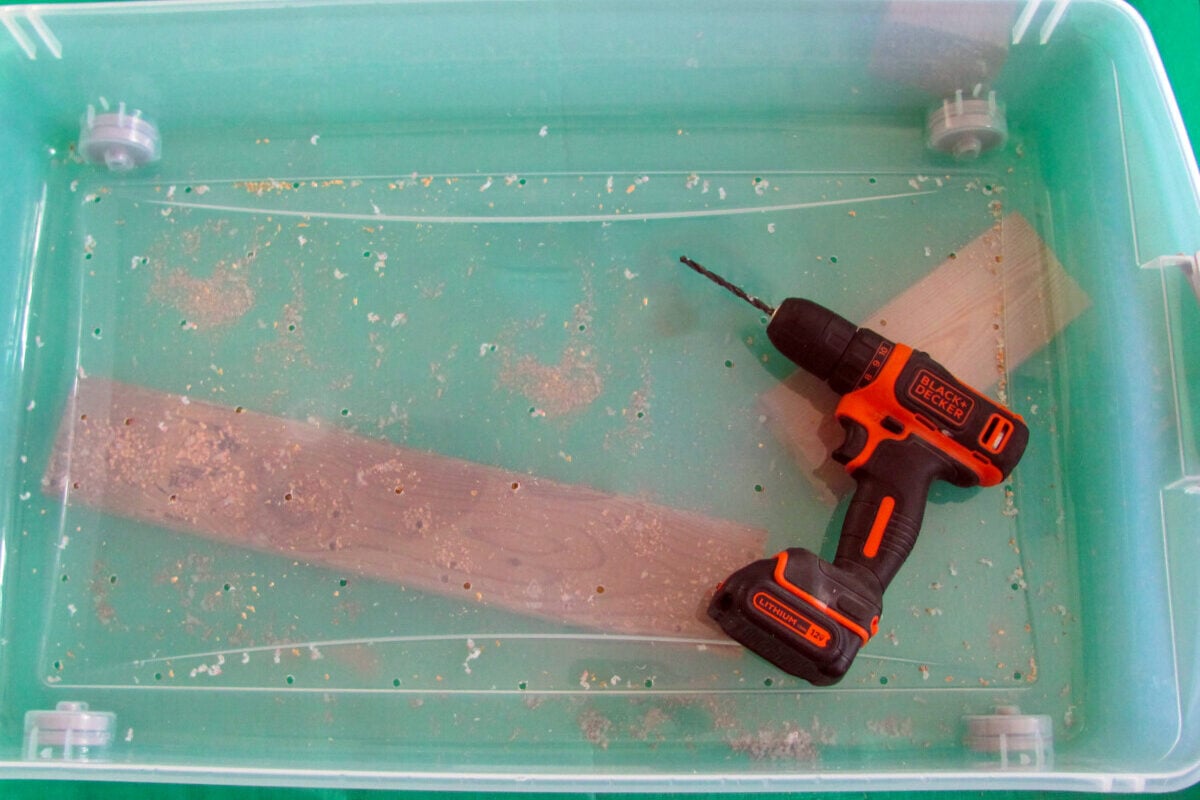
Once you’ve rounded up all your materials, the next step is to begin modifying the storage tote.
The holes you make should be roughly 1/8 to 1/4 inches in diameter, spaced 3 inches or so apart.

To prevent the plastic from cracking, drill into a scrap piece of wood. Hold down the plastic firmly and slowly apply pressure and speed to the drill bit.
Drill holes in both sides of the container: the bottom for drainage, and the top to allow air, rain, and snow inside.
Step 3: Pack Planters with Soil and Moisten
Now it’s time to fill up your pots, seed flats, or plug trays with your chosen growing medium.
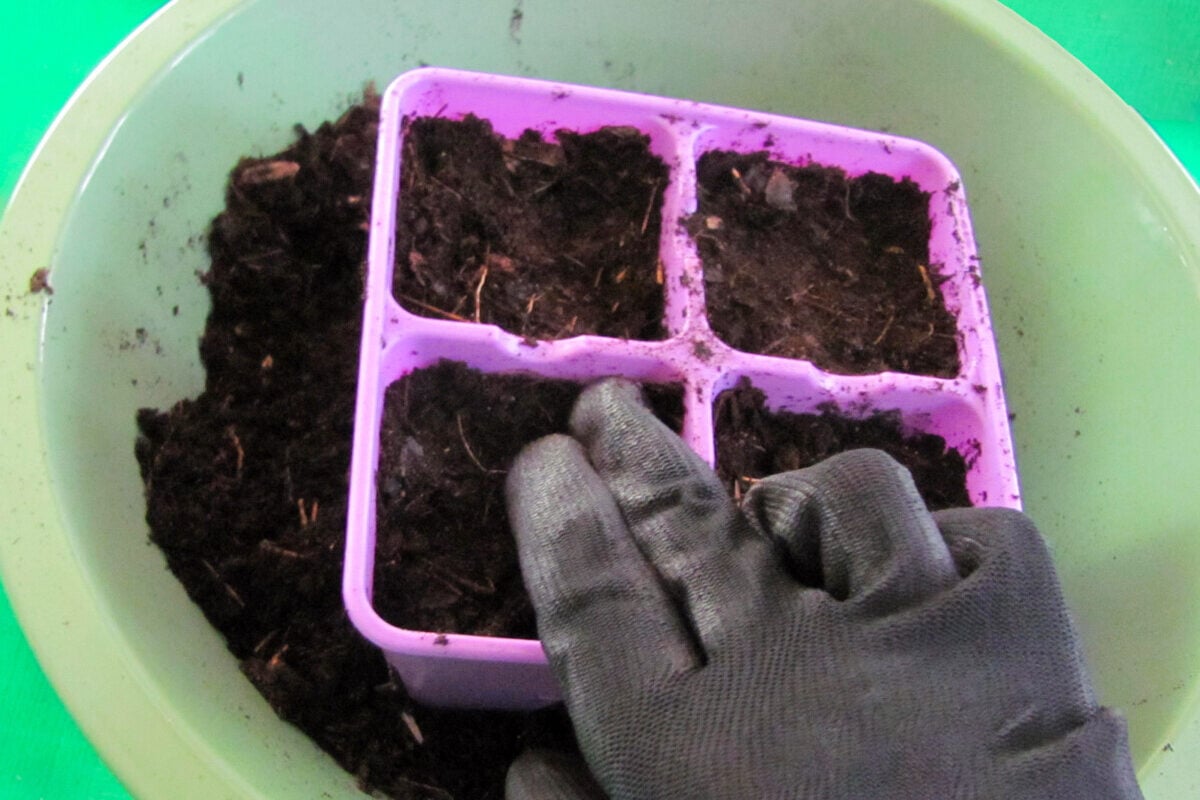
Make sure you tamp the soil down in the container. Keep adding and firming the soil until you have at least 3 inches of planting depth.
Before adding seeds, moisten the growing medium thoroughly until water drains freely from the bottom of each plug.
Step 4: Sow Seeds and Double Label Containers
Follow the seed packet instructions for planting depth. Many native plants need light to germinate and should be sown along the soil surface.
Each container should have two labels – one inside the container and one on the outside of the container. Like so:
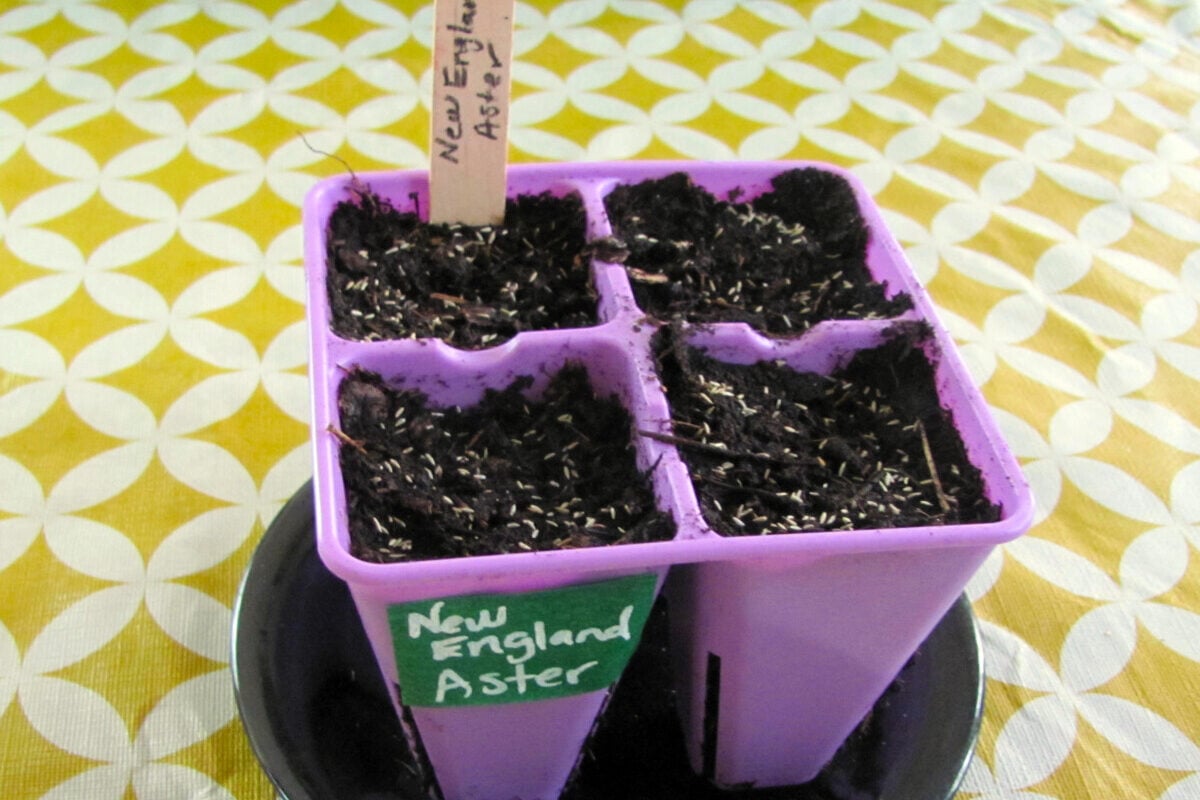
Many a winter sower has ended up with mystery plants by spring after a long winter season outdoors.
Be sure to write with your water and UV-resistant pens to mark the plant species twice on each and every container, plug tray, or pot.
Step 5: Assemble Your Containers
Before placing the plug trays inside the mini-greenhouse, I added a couple layers of packing paper to the bottom of the tote. This serves as a barrier against slugs and other plant-nibblers once the spring season arrives.

Now on to the satisfying part – arranging your seeding pots inside the tote.

Take a moment to admire your work! Then attach your lid.
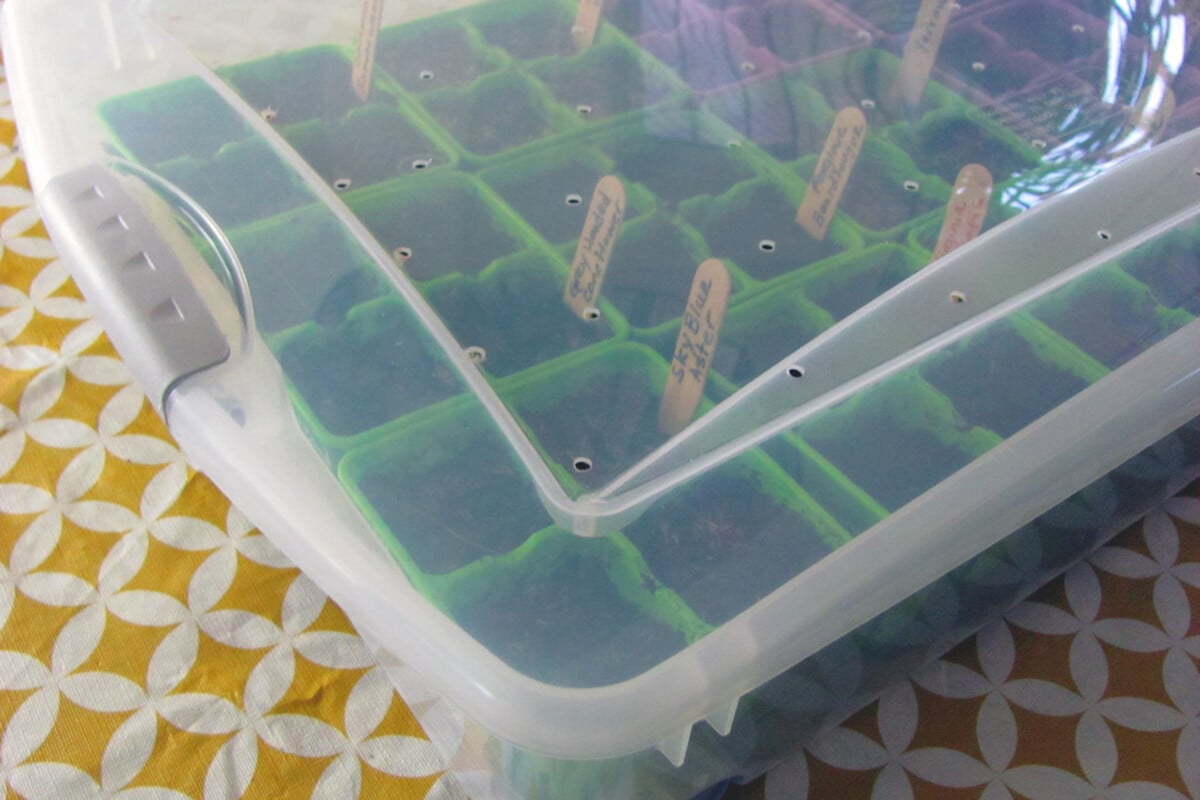
If your greenhouse doesn’t have a snap-on cover, painter’s tape can be used to seal the seam all the way around.
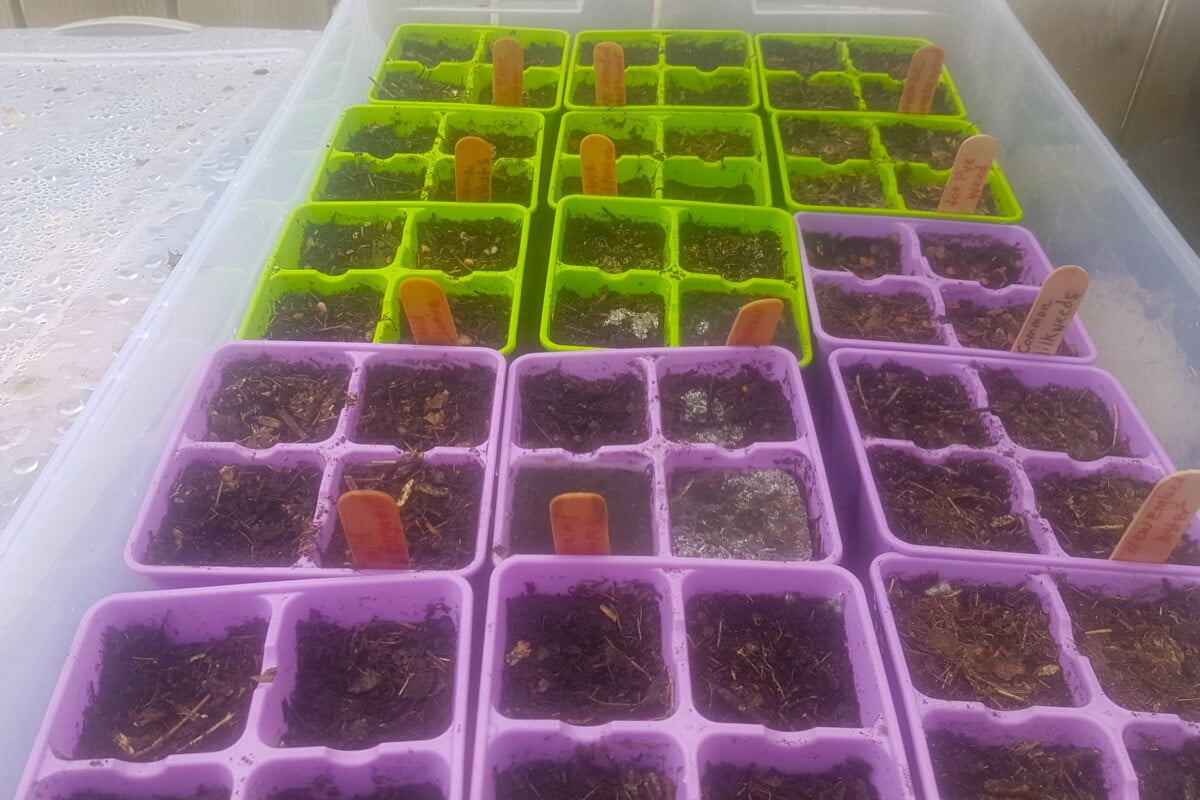
Step 6: Place Containers Outside

Place your winter sowing containers outside in a spot with full shade. A shady location is coldest and helps prevent premature germination during a brief warm spell. The north side of your house is a good option, but you can place containers anywhere there is deep shade.
The site you choose should also be unsheltered. Winter sowing containers need to be out in the open where they can freely receive snow and rain. Keep them away from roofs, awnings, and other obstructions.
Try to tuck jugs or containers out of footpaths so they won’t be trampled or knocked over by pets, clumsy people, or strong winds. You can create a perimeter around your setup with bricks or bales of hay.
Step 7: Wait for Spring

Once set outside, there’s not really much to do until spring.
During intermittent thaws, take a peek inside to make sure the soil is still frozen.
If the soil has thawed and you see condensation on the lid, you shouldn’t need to irrigate yet. If there is none or very little condensation, it’s time to water.

As the weather warms, check in on your seeds more frequently – you don’t want to allow the soil to ever dry out.
When watering, be gentle. Water from the bottom or use a mister or pump sprayer to avoid disturbing the seeds.
Step 8: Move Winter Sowing Containers to Part Shade Location
When true spring approaches, move your winter sowing setup to a site that receives 3 to 6 hours of sunlight. Keep monitoring moisture levels and water as needed.
On warm days, remove the lids and replace them in the evening. When temperatures are consistently 65°F to 70°F (18°C to 21°C), keep the lids off permanently.

Here’s where some hardware cloth or chicken wire comes in handy. I’m taking no chances with the squirrels and have covered the top with wire mesh, weighed down with bricks.
As spring ticks along, keep monitoring your seedlings and water them as needed. As the tiny plants grow into juveniles and the nutrients in the growing medium get taken up, you may need to fertilize periodically.
If you notice the leaves are beginning to yellow, use a gentle fertilizer to perk them back up. Dilute feedings of weed tea or fish emulsion are good seedling-safe options, as are slow-release green manure or alfalfa pellets.
Step 9: Thinning Seedlings and Potting Up
If you overseeded your containers, as I did, there comes a point where you’ll see the seedlings’ growth has stalled. Crowding too many plants in a tiny container stunts their development, so we will need to thin them out or separate them for planting in larger pots.
Seedlings too small and delicate to transplant can be thinned out with a pair of tweezers.
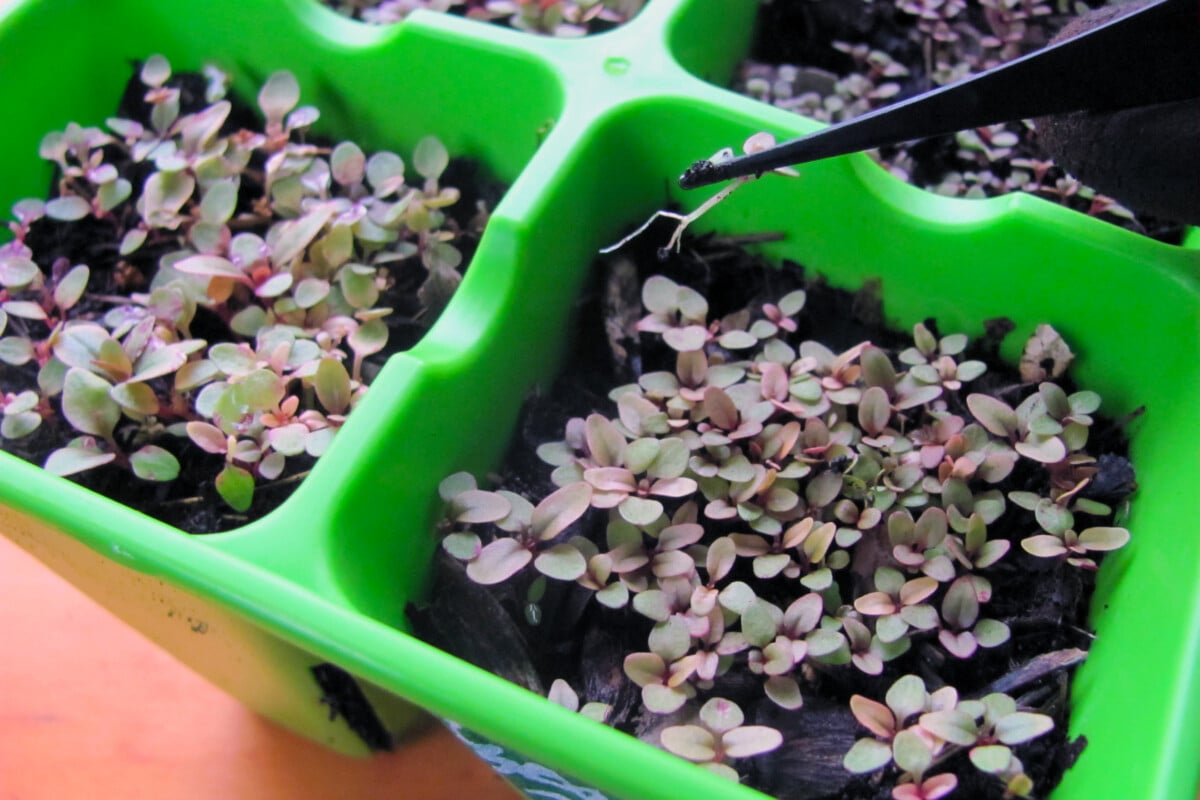
Larger seedlings with at least two sets of true leaves have a much better-developed root system. As they are more mature, they can handle being pulled apart and re-potted with less risk of transplant shock.
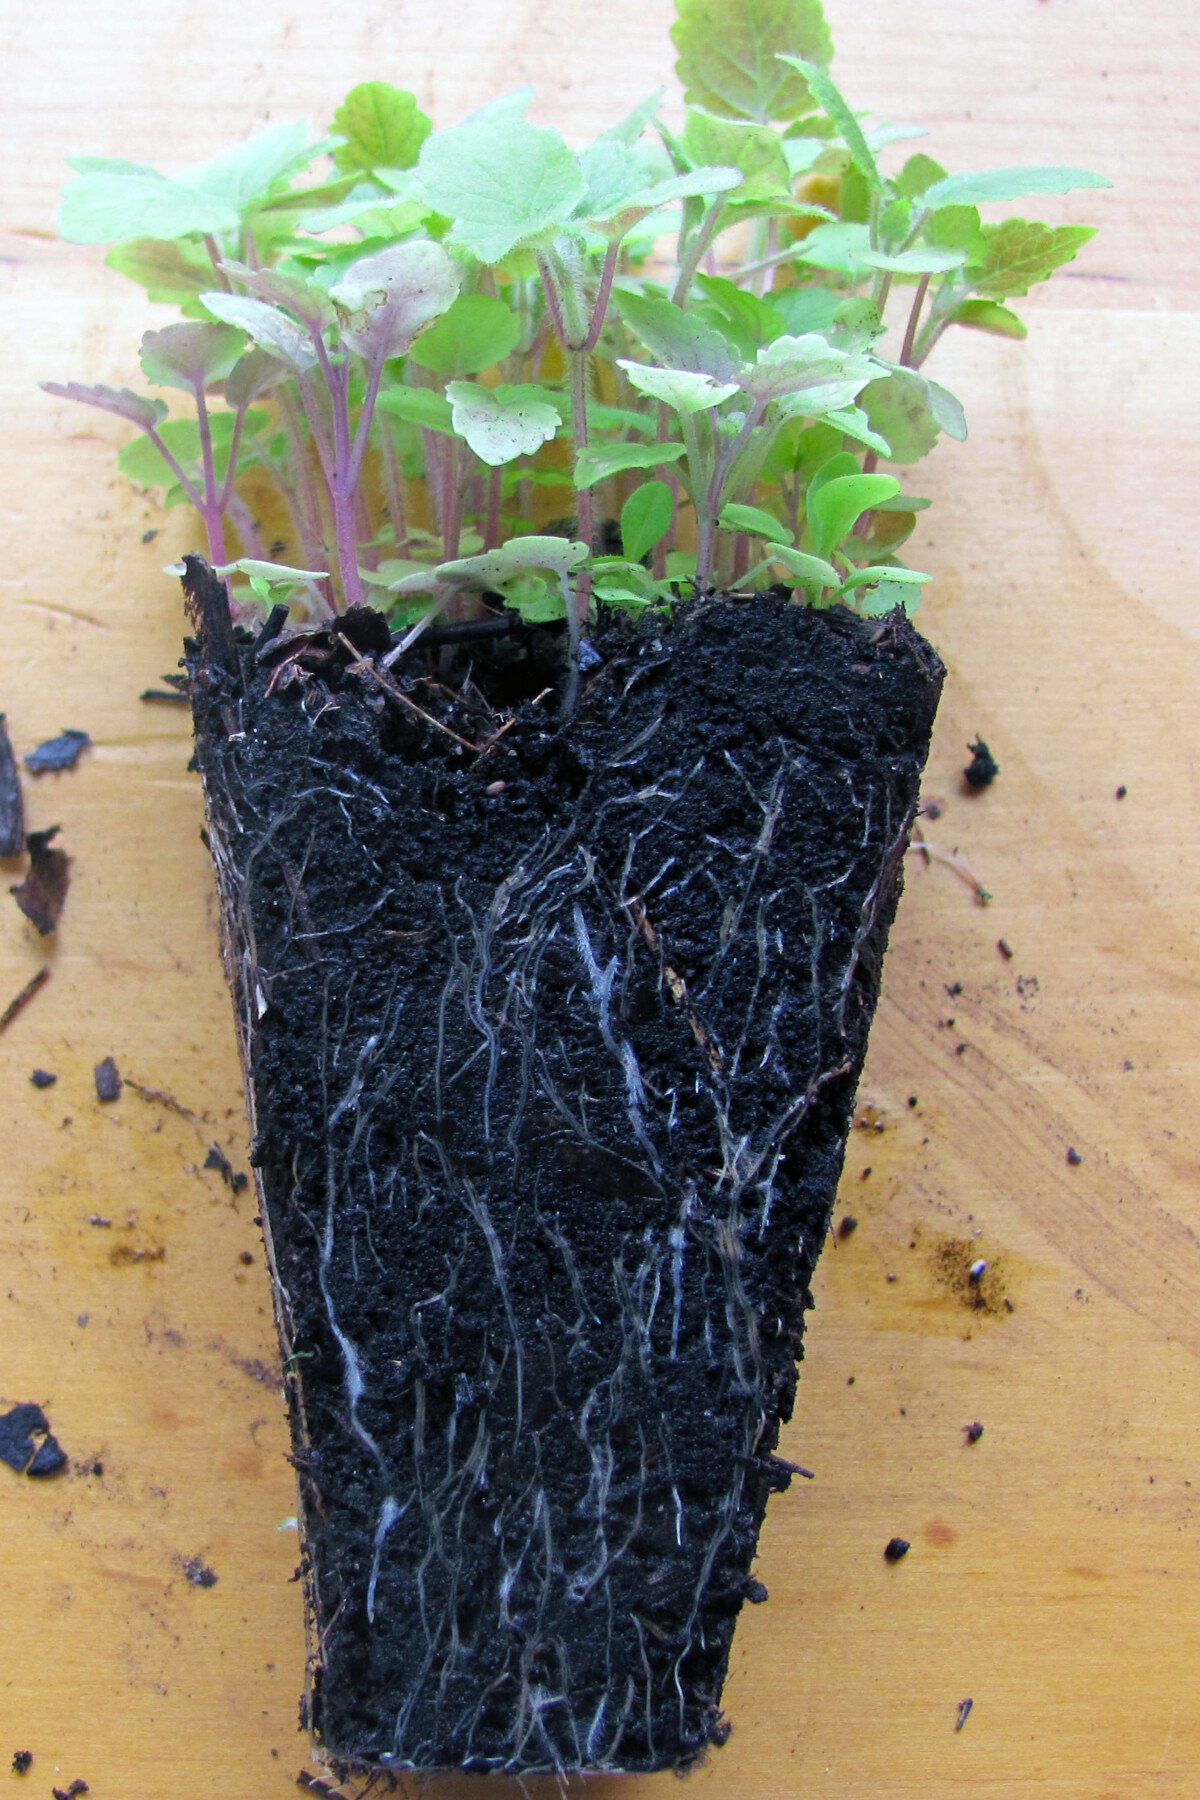
To separate your seedling hunk, first moisten the soil and then pop it out of the container. Gently grasping the base of the seedlings just below the soil line, pull them apart. Go slowly and take care not to break any roots.

The roots should separate easily at this stage. You can pot up seedlings individually or in smaller clumps.
Use fresh potting mix and water the seedlings well. Place them in the shade for one week to help them recover from the transplanting process.
Step 9: Planting Out Into the Garden
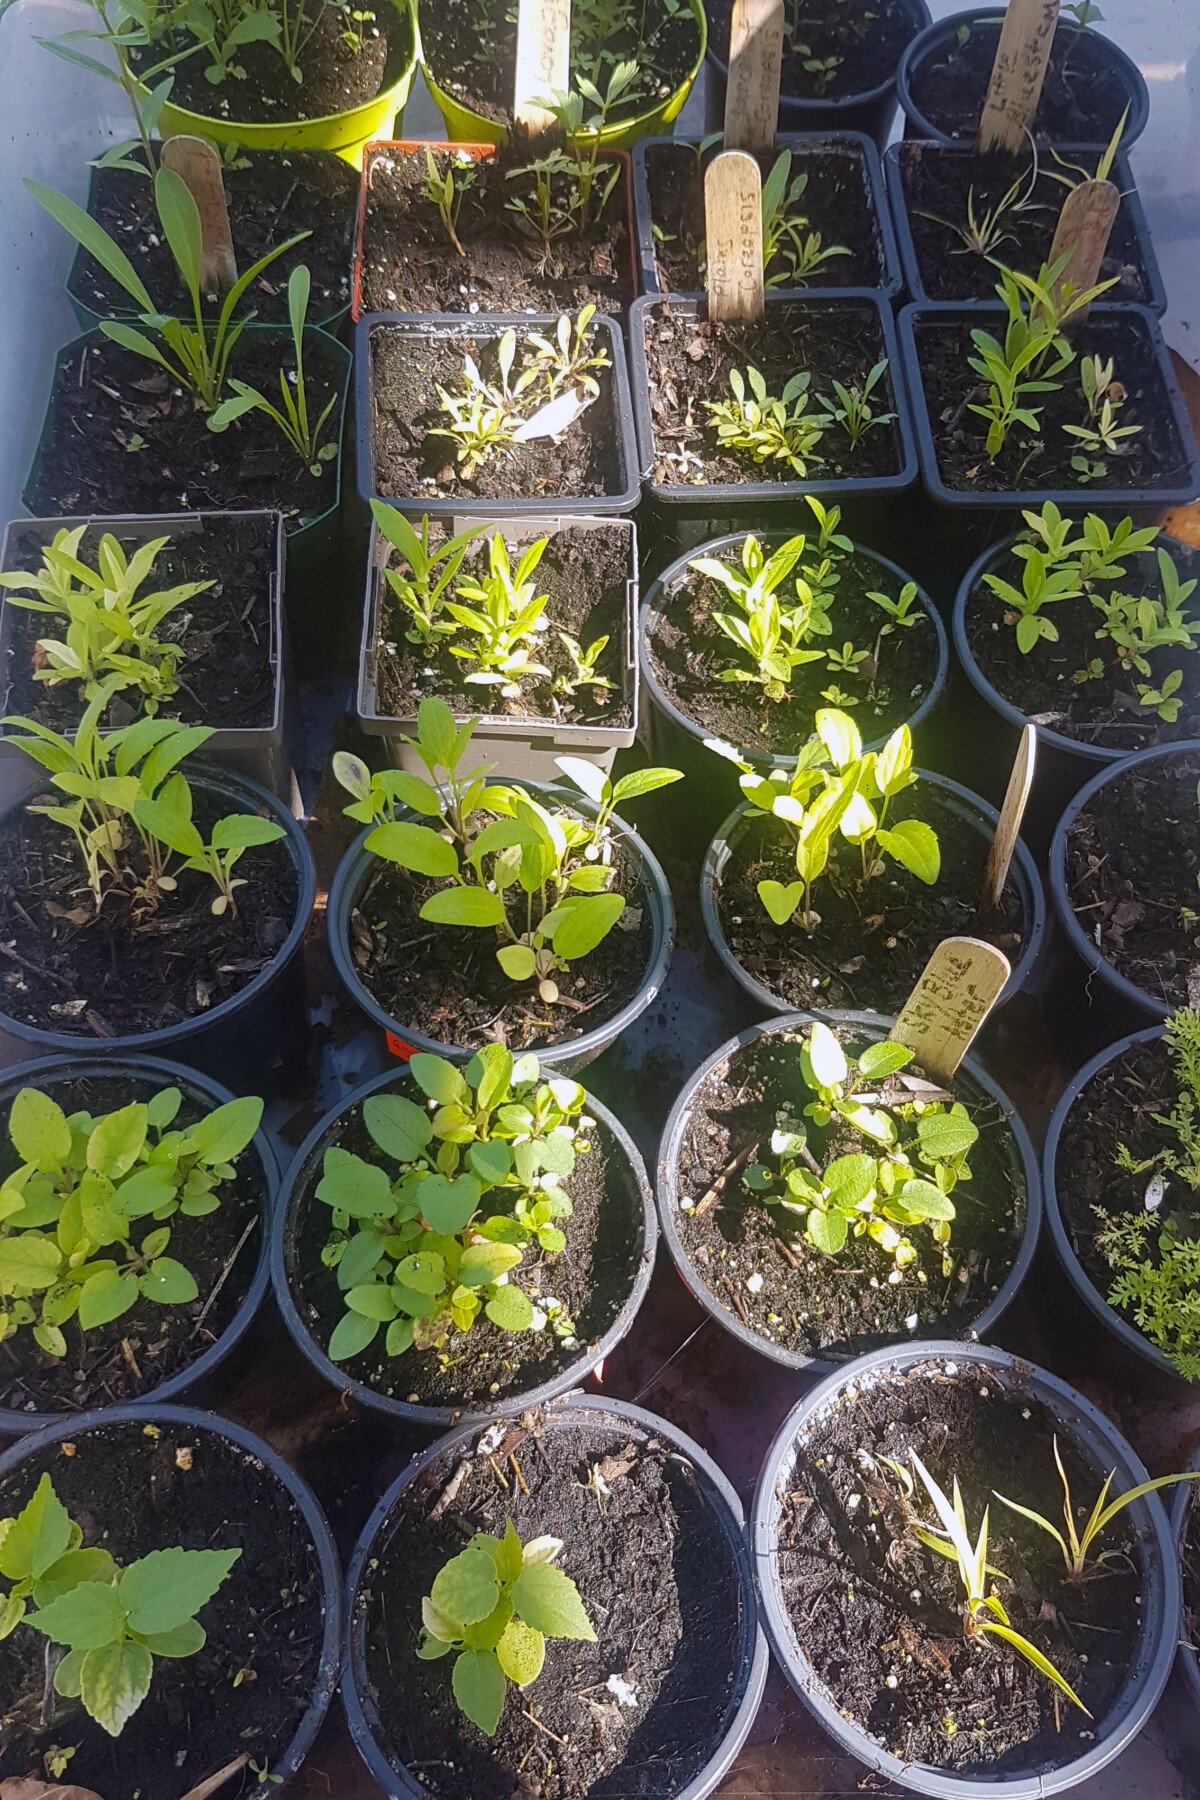
You can skip the potting up step altogether and plant your seedlings into the garden once they are at least 2 inches tall and have two sets of true leaves. At this age, the plants are still young and pretty fragile, so I prefer to wait and plant them out when they are around 5 to 7 inches tall.
Trees, shrubs, woody perennials, and other slower growers can be raised in pots throughout the summer and planted in the ground in the fall.
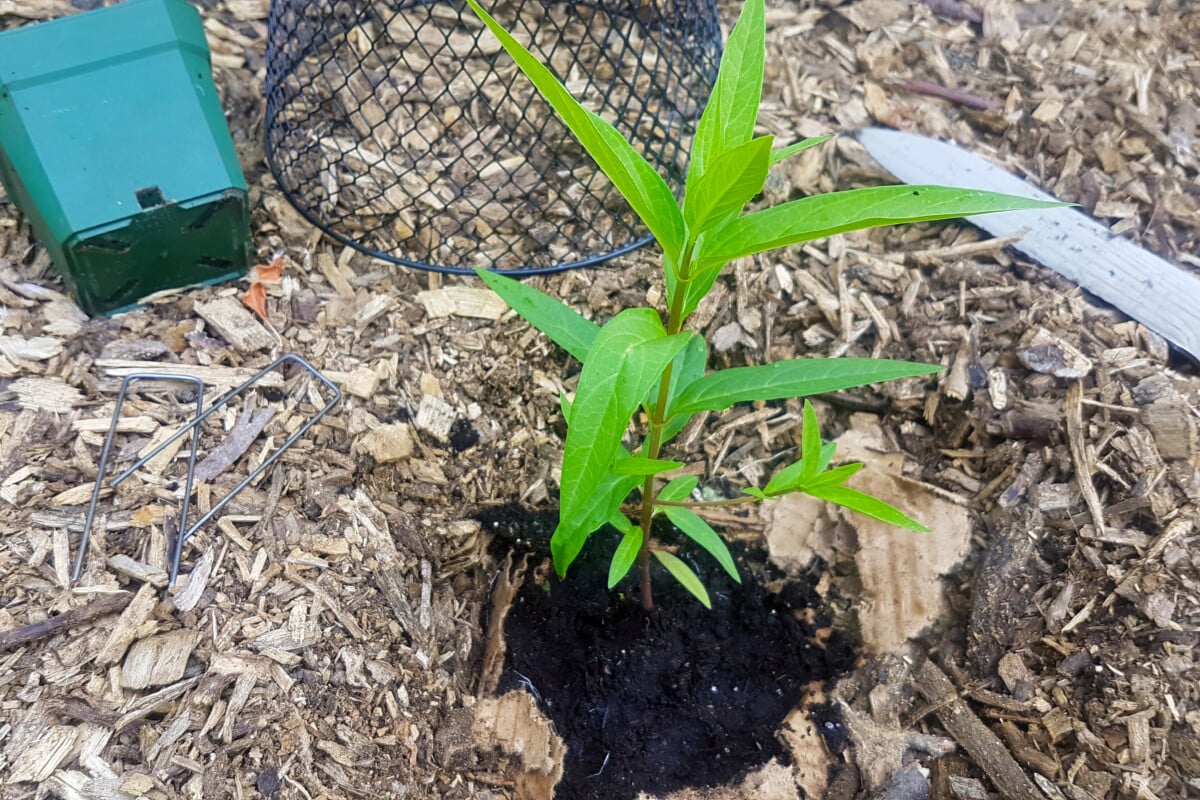
I have a lot of bunny pressure – and they find many natives absolutely delicious, of course, so I use small wire baskets I purchased from the dollar store to protect them until they’ve had a chance to grow.
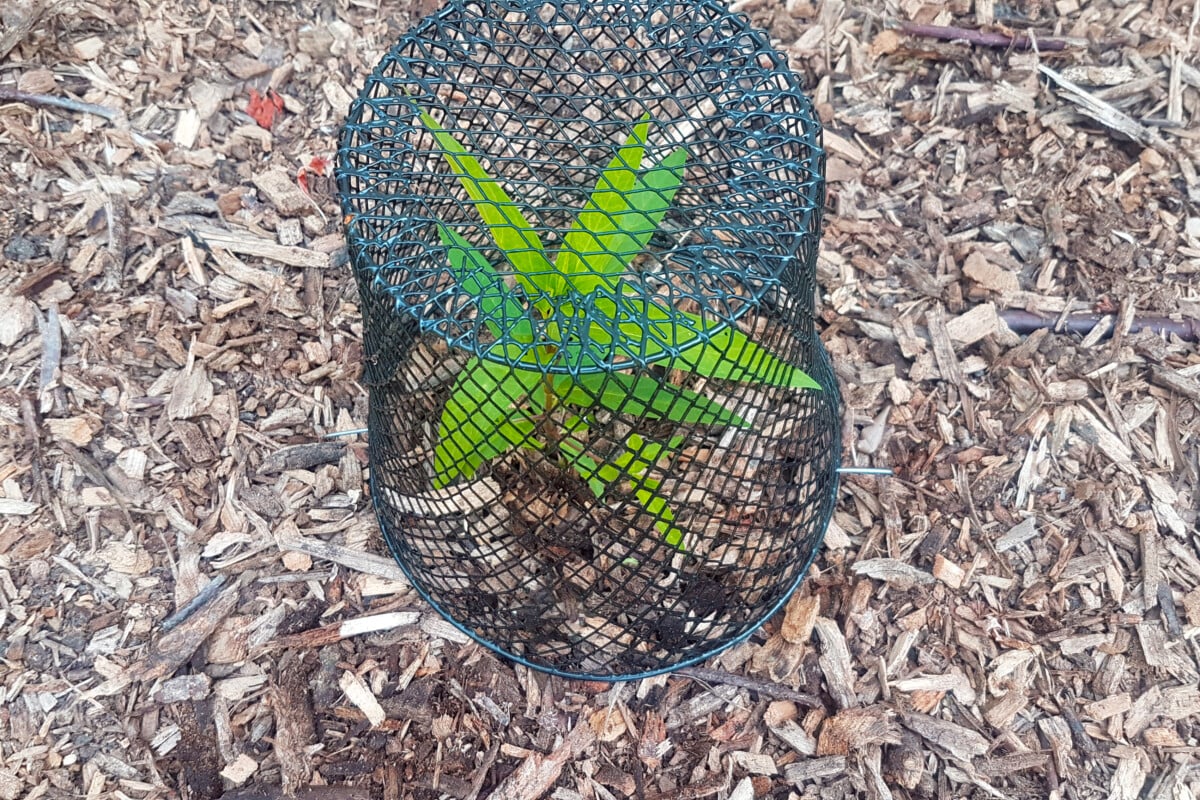
Pop it over the plant and use ground staples to secure it to the ground. I’ll remove the baskets once the plants have filled out some more and can survive a nibbling.
All in all, winter sowing is a wonderful way to fill in your gardens at a fraction of the cost. It’s a fun project that gets your hands back in the soil in the dead of winter. You can grow dozens upon dozens of native plant varieties all at once – many of which you’re unlikely to find at the nursery. It’s an easy way to achieve cold, moist stratification with a very high success rate, and you don’t need a spare fridge or dedicated grow room to do it.

Get the famous Rural Sprout newsletter delivered to your inbox.
Join the 50,000+ gardeners who get timely gardening tutorials, tips and tasks delivered direct to their inbox.