These charmingly rustic pinecone flower Christmas ornaments are the perfect craft for a snowy winter day. (Don’t worry, you can still make them if you don’t have any snow.) These sweet ornaments come together surprisingly quickly, and beyond a pair of hand pruners and a few basic craft supplies, you don’t need much to make them. They can be as simple or elaborate as you wish. Break out the craft supplies and let’s make up a bunch!
If you’ve been collecting pinecones throughout the year, the holidays are a great time to put them to good use.
After all, they look great no matter what you do with them.
On their own, unadorned, they bring a bit of the outdoors inside. Tuck them into a basket or bowl, and voila, you have elegant Christmas decorations. But with a little paint or glitter, surely you can create something even lovelier.
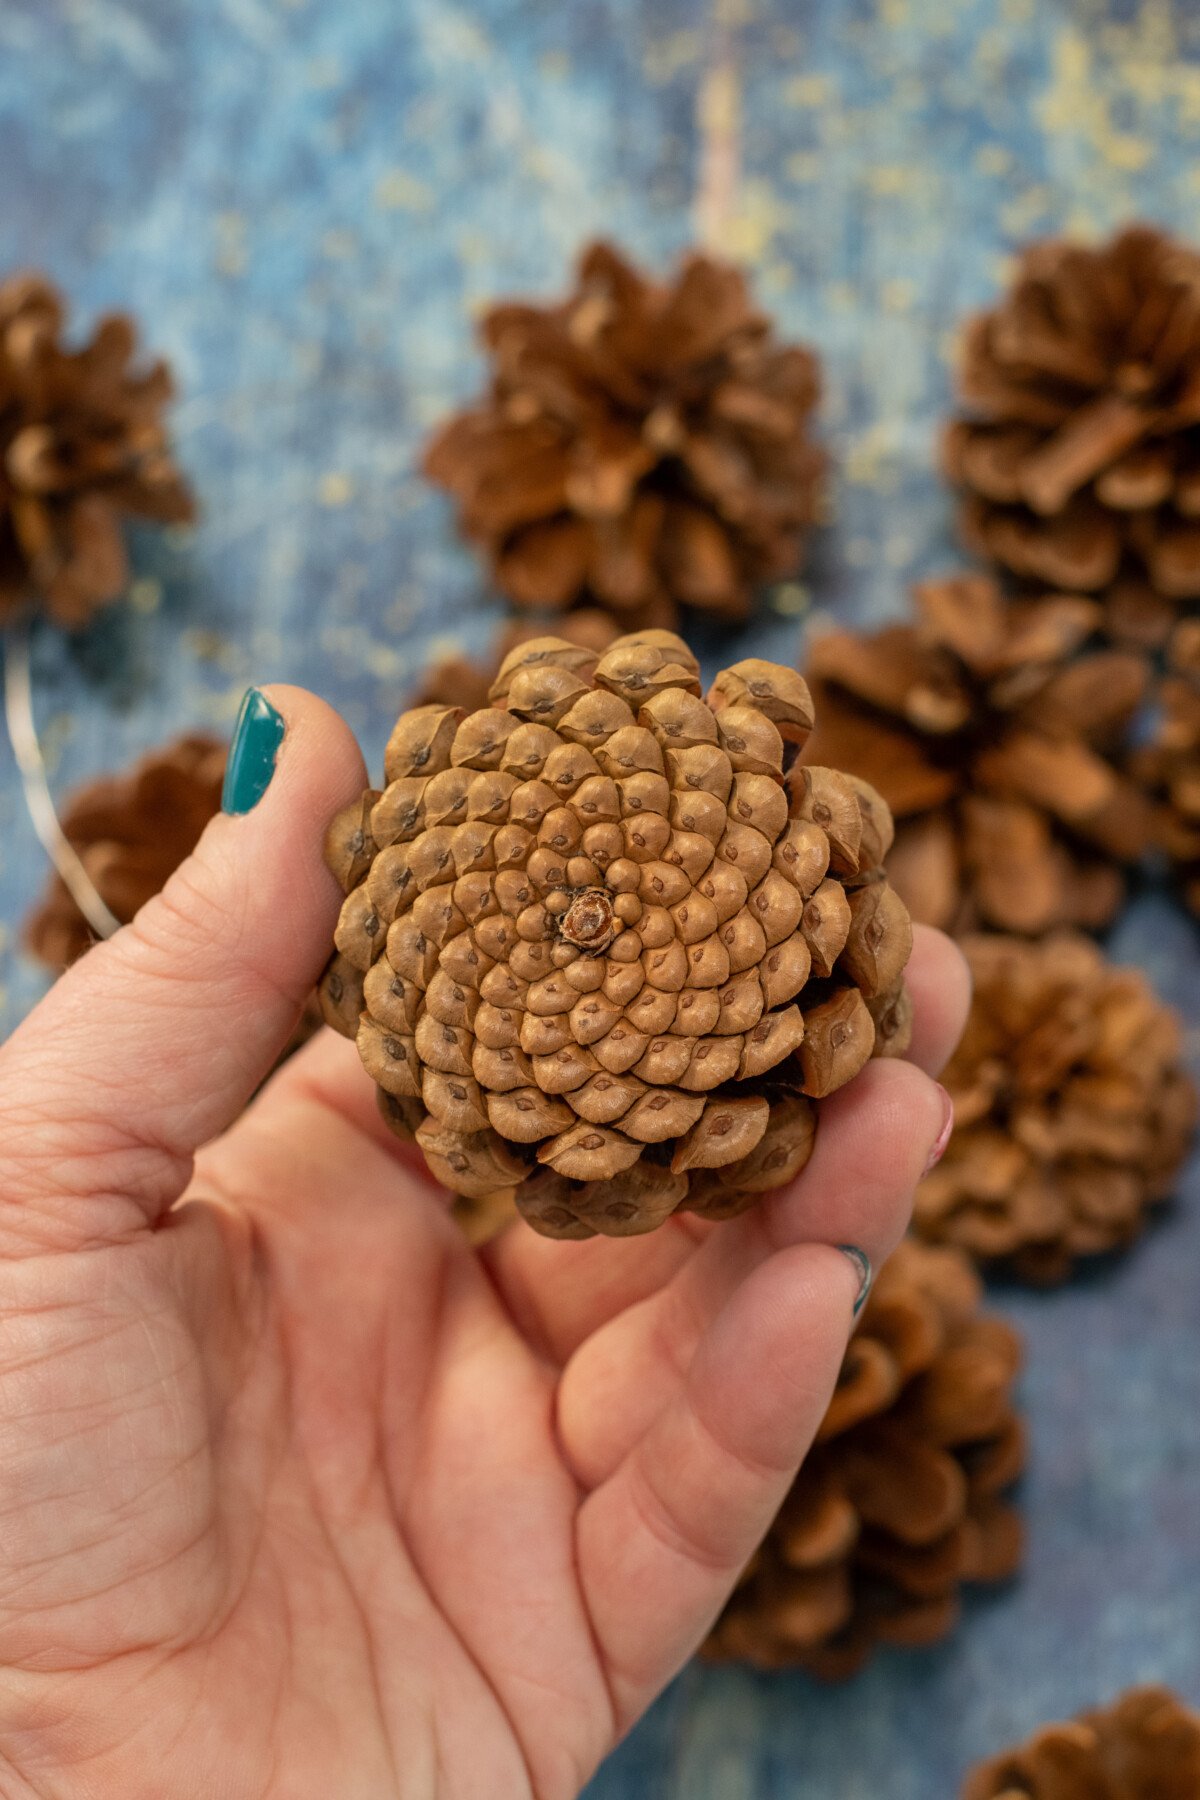
As a gardener, I couldn’t help noticing the beautiful rosette pattern on the bottom of pinecones. And with that in mind, the top of a pinecone reminds me of the pistil of a lily. So, why not make pinecone flowers?
Nature already gave us a pretty good head start.
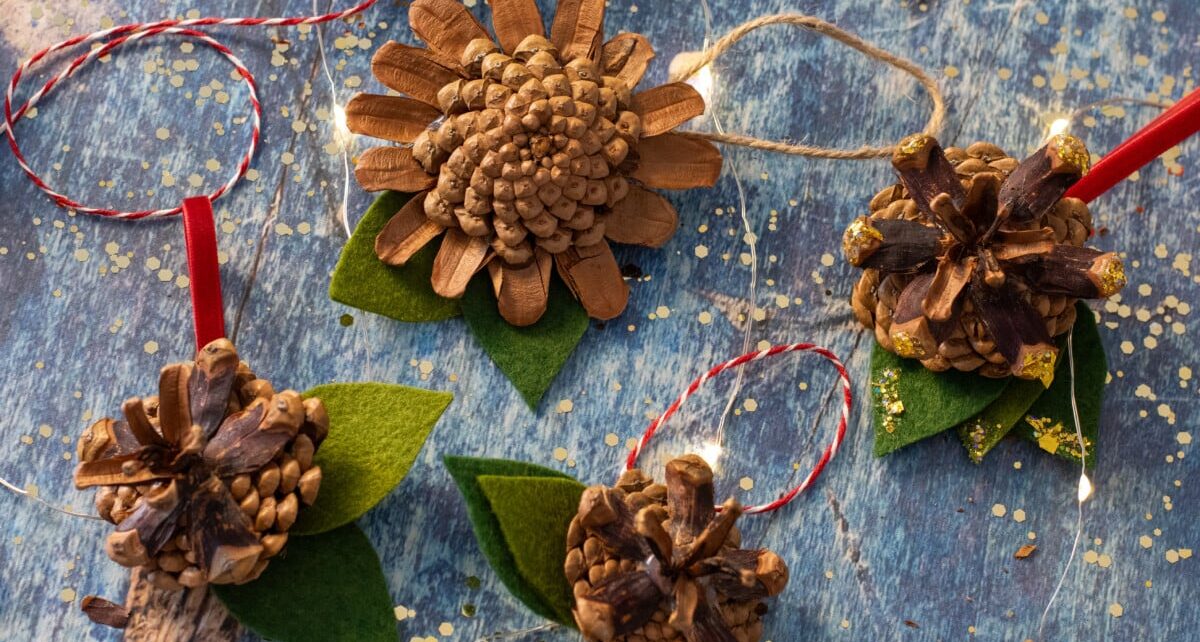
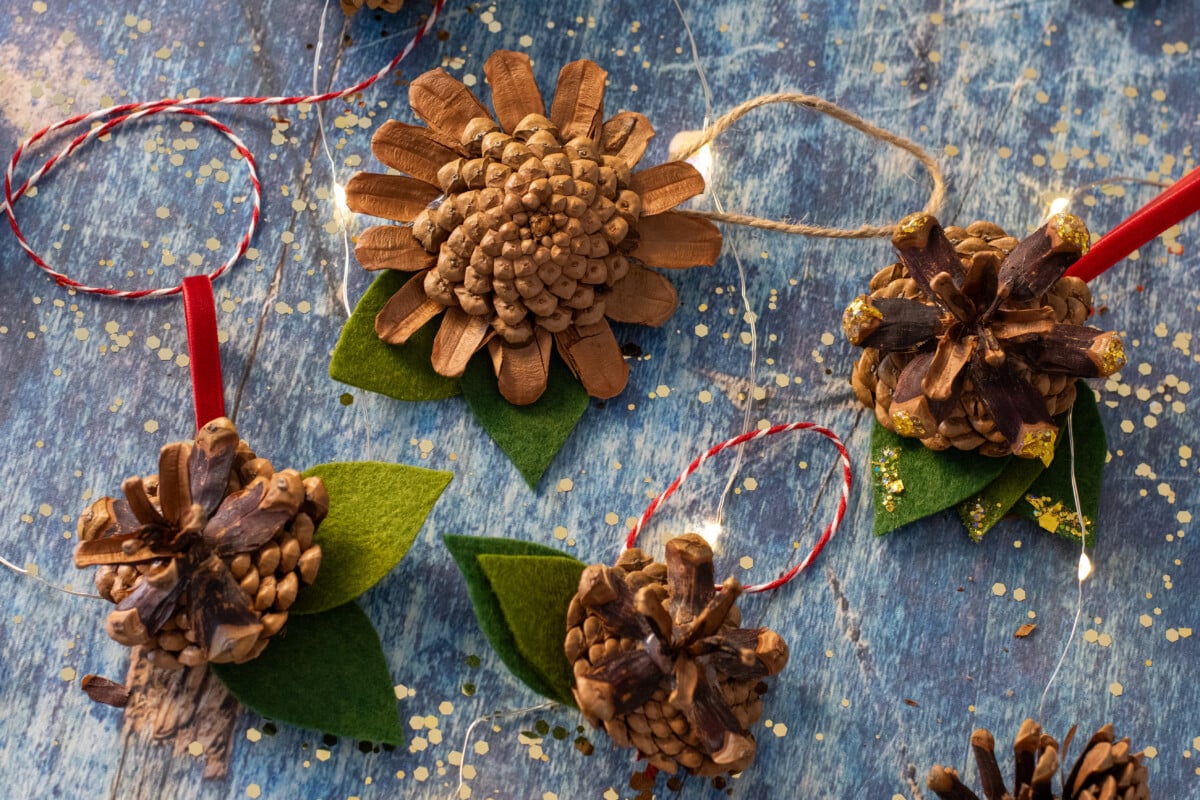
For these pinecone flower ornaments, we’ll be cutting up a single pinecone and rearranging its parts to make it look like a flower. Then we’ll add a touch of paint or glitter if desired, and who doesn’t desire a touch of glitter in their life? Finally, we’ll finish it off with some felt leaves and a twine hanger.
As I mentioned at the start, you can make these ornaments as simple or elaborate as you wish. It all depends on the look you’re trying to achieve. If your Christmas aesthetic is more rustic, then keep it simple.
If, like me, the word “maximalist” best describes your Christmas décor, then by all means, grab the glitter and make it count.
Baking the Bugs
If you’re using pinecones you’ve collected yourself, you’ll want to be sure to bake them before you make anything with them. This will kill any hitchhiking bugs and help dry them out and open them up a bit.
However, for this craft in particular, you’ll want to check them frequently as they bake. Heat makes the pinecones open up more, and we don’t want the bottoms to open completely. We want to preserve the beautiful rosette.
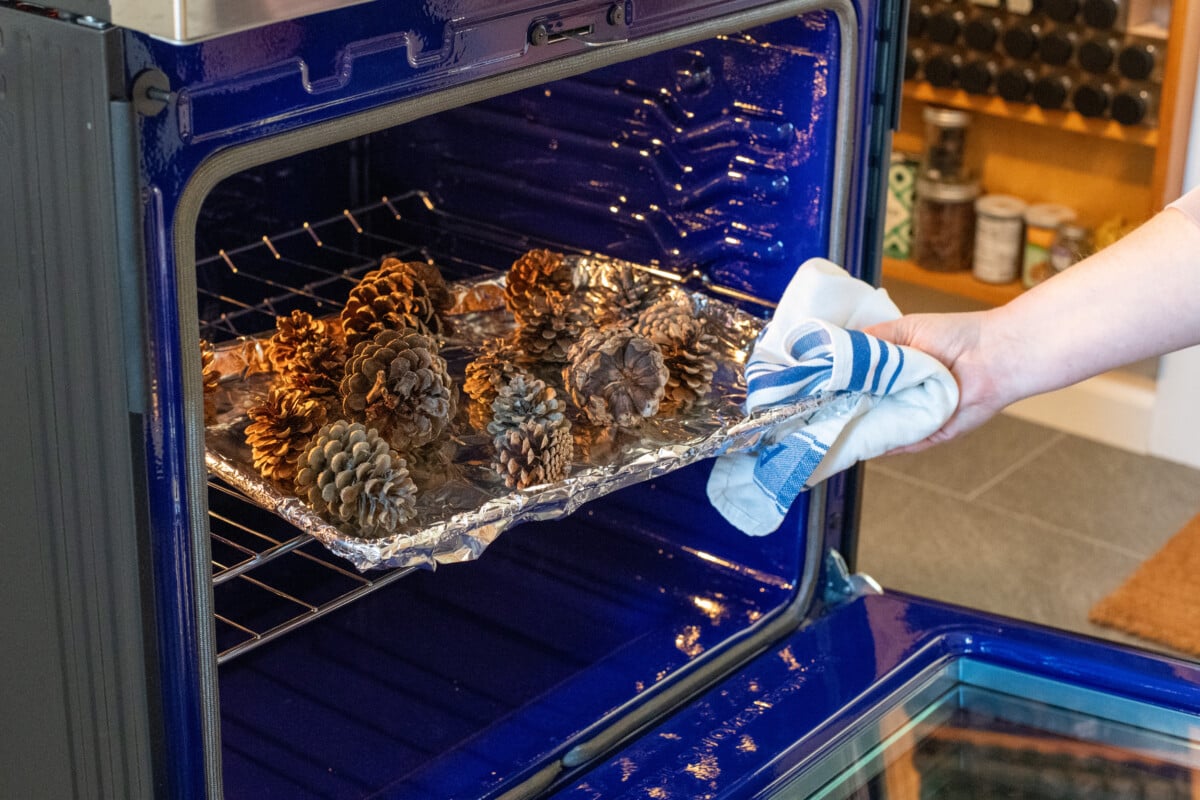
- Preheat your oven to 250°F and line a baking sheet with aluminum foil.
- Place the pinecones in a single layer on the baking sheet.
- Bake them for 30 minutes.
- Pine sap is flammable, so check your cones frequently.
- Remove from the oven and allow them to cool.
Now that you have debugged your pinecones, we can get to work.
Supplies
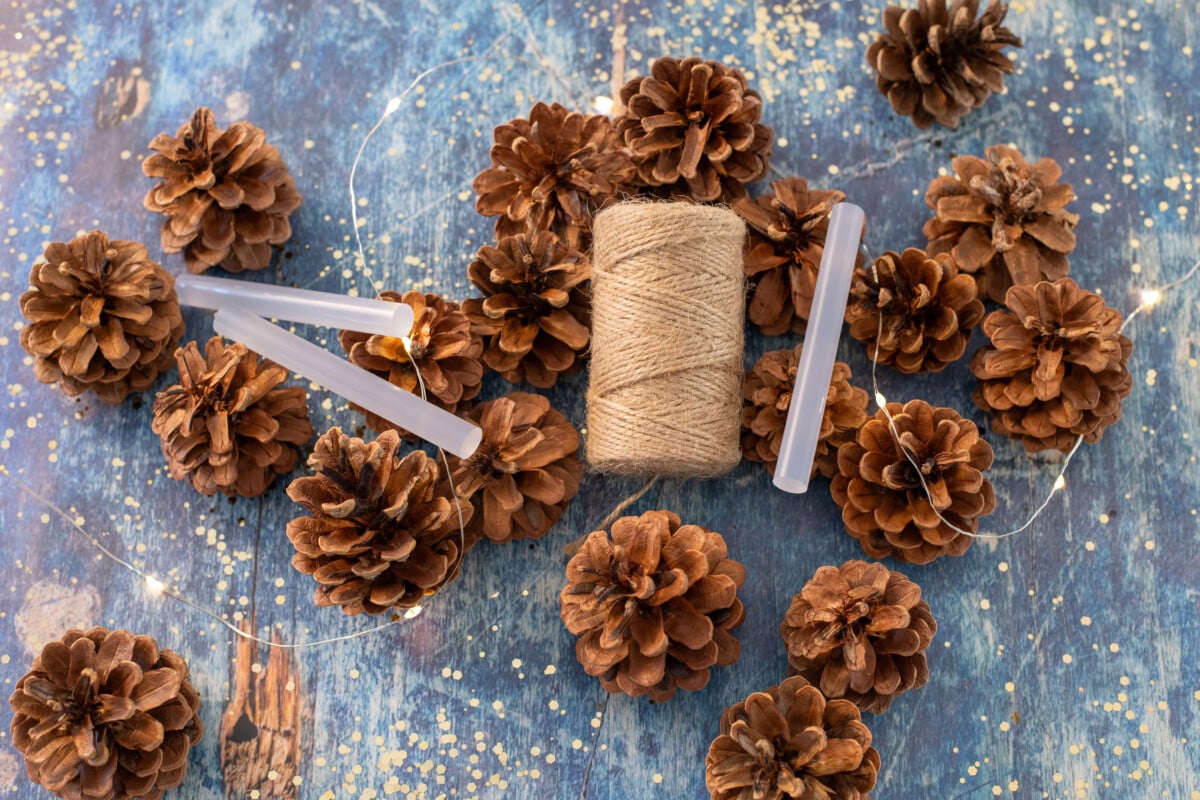
- Pinecones
- You’ll need a few basic crafting tools for these ornaments.
- Sharp hand pruners
- Scissors
- Hot glue gun and glue sticks
- Green felt
- Paper and pencil
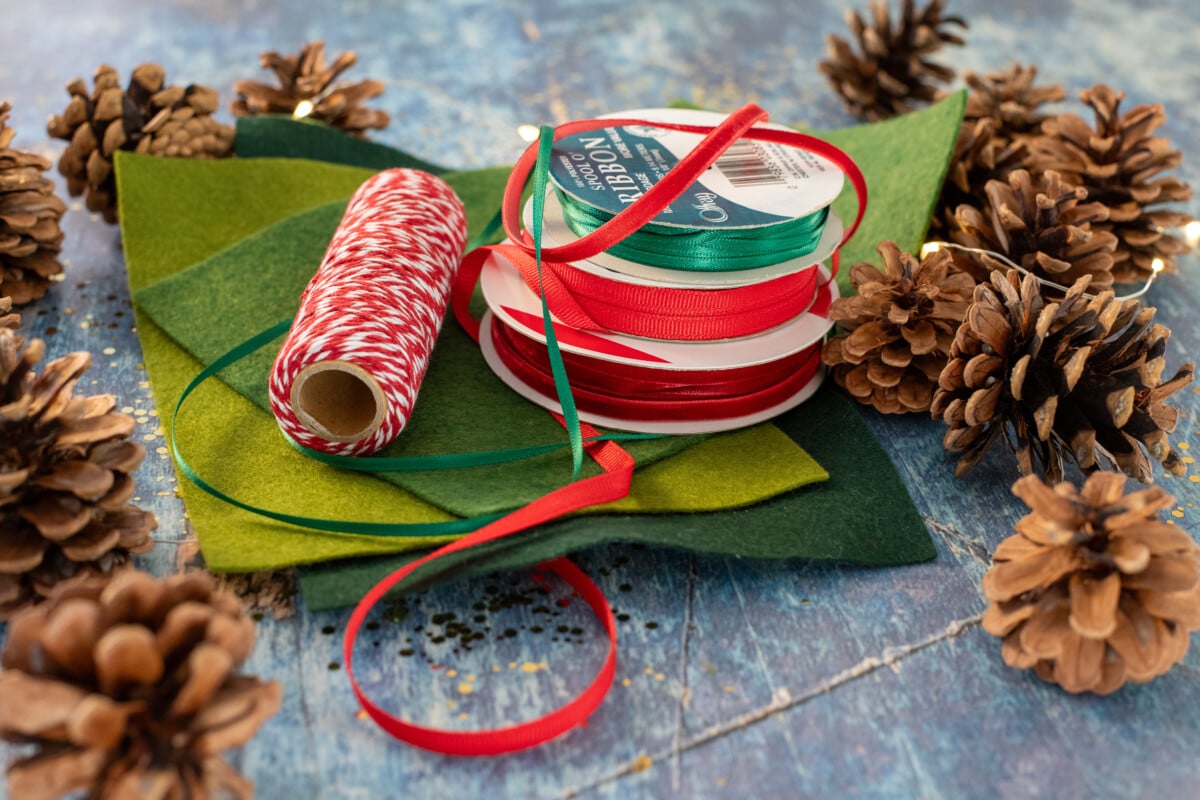
- Twine
Optional:
- White paint
- Glitter and glue or glitter paint
- Embroidery floss
- Ribbon, red and white baker’s twine or gold cord

Instructions
Prepping your pinecone

- Using the hand pruners, snip the bottom of the pinecone off. It works best if you cut a row of petals or two above the rosette and then remove the extra petals. (If you want to save your beautiful Christmas manicure, you might want to wear garden gloves for this part. I didn’t and chipped mine.)
- Now, carefully pull petals off the pine cone, starting from the bottom up and save the nicest ones.
- Finally, cut the very top of the pinecone off. You’ll have a small star-shaped segment.
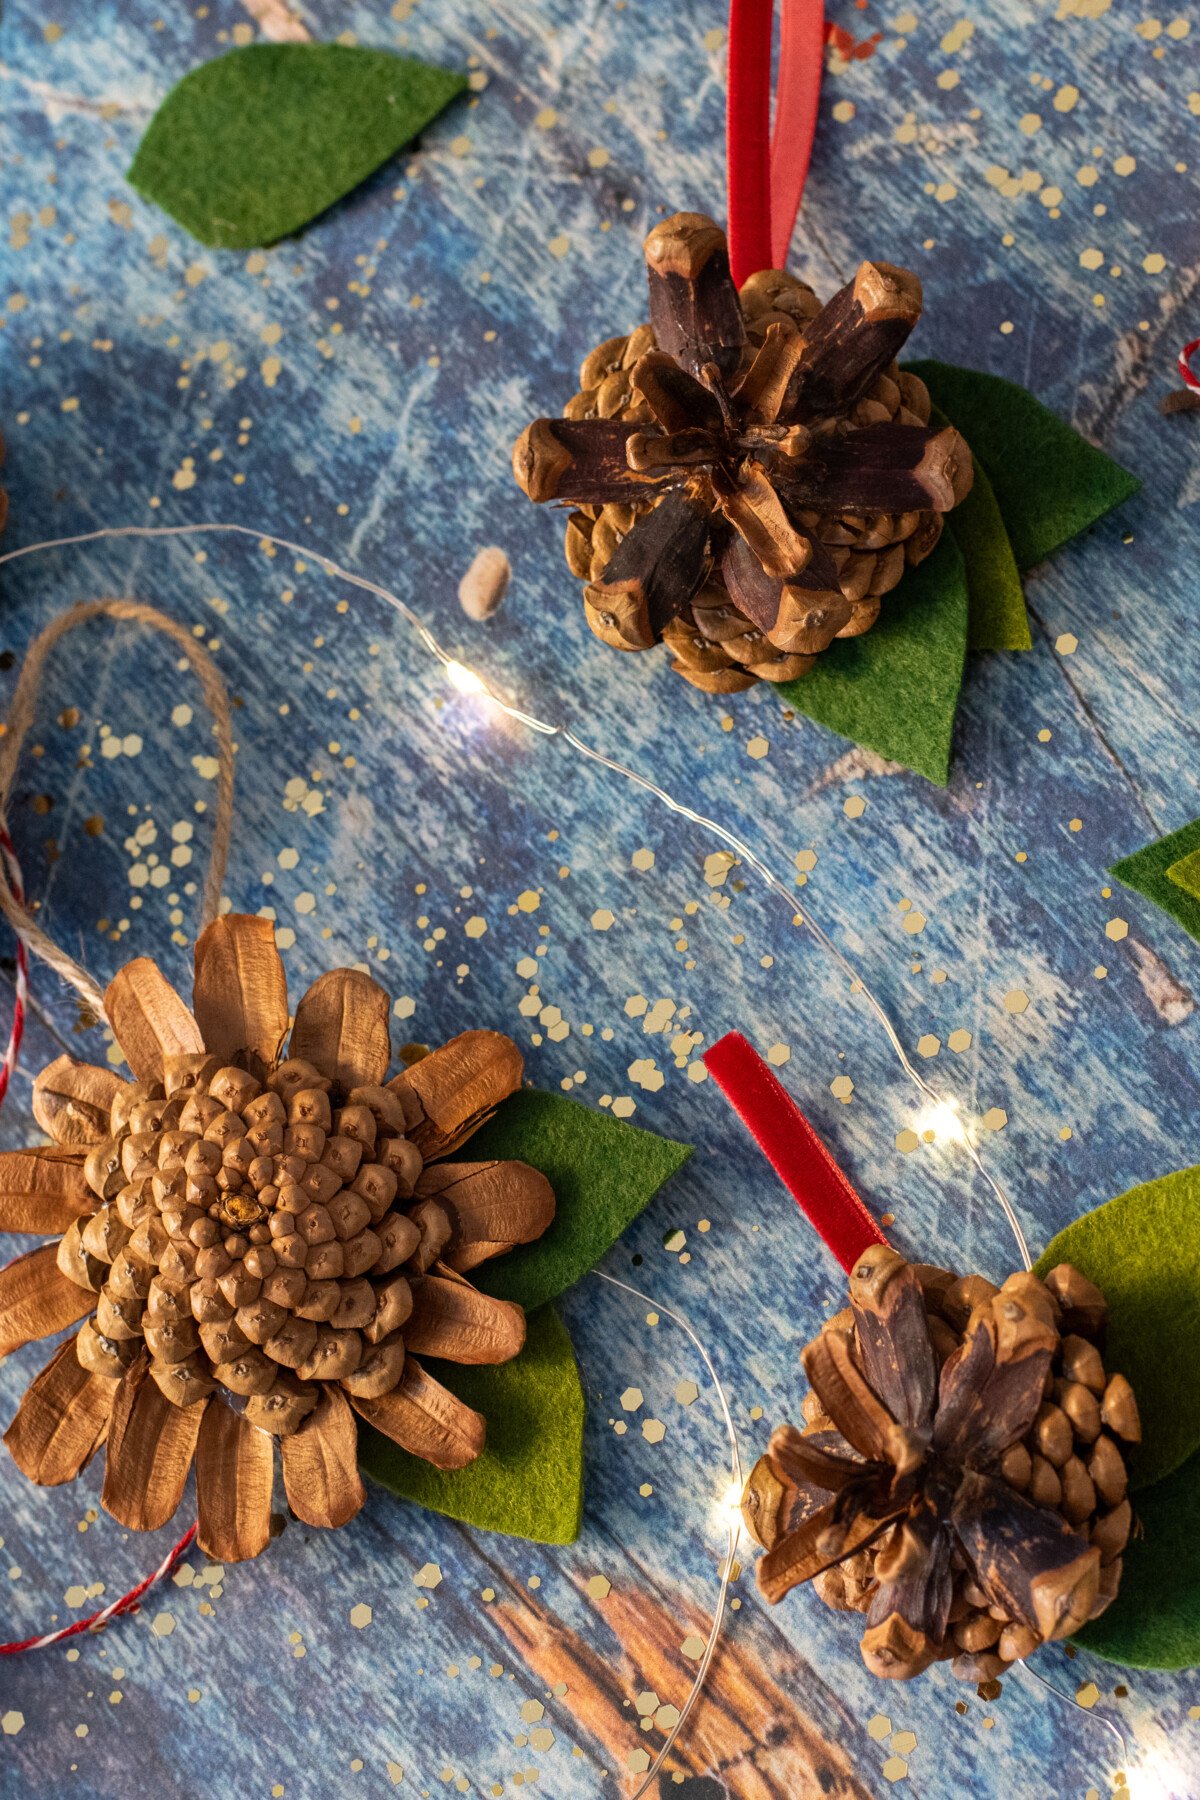
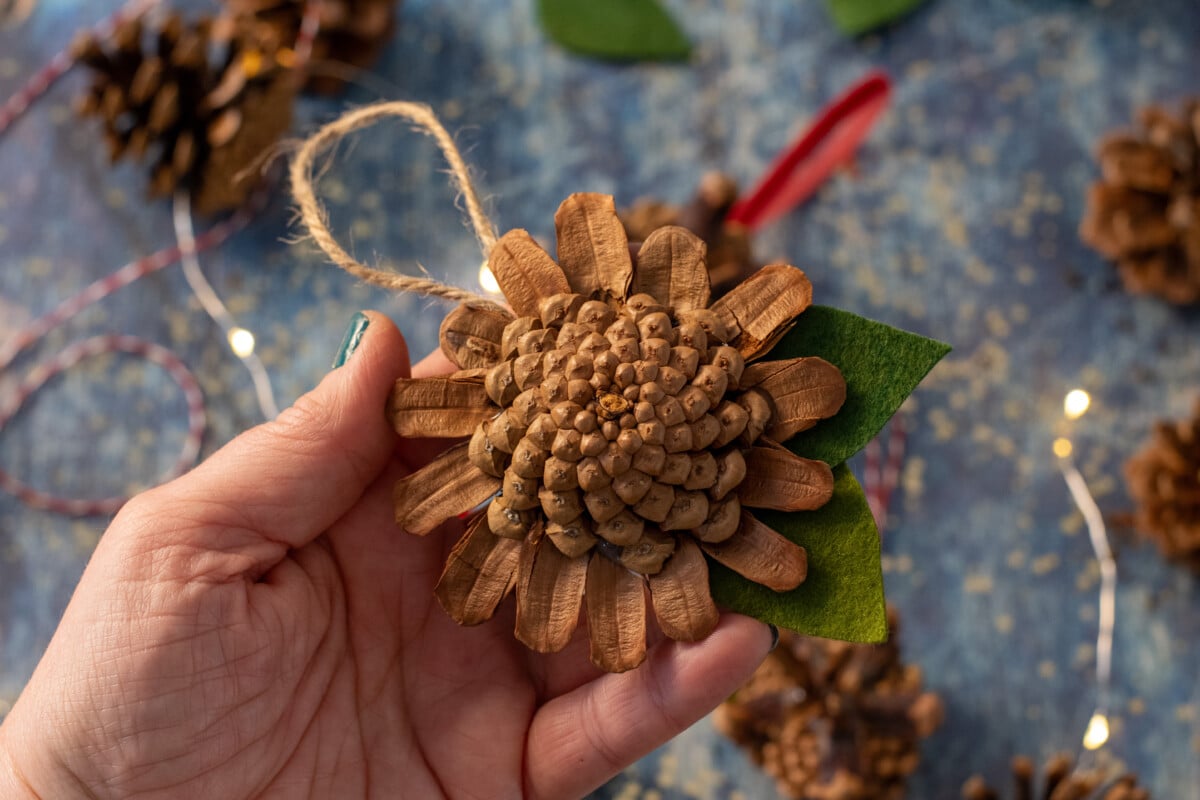
Assembling a Basic Flower
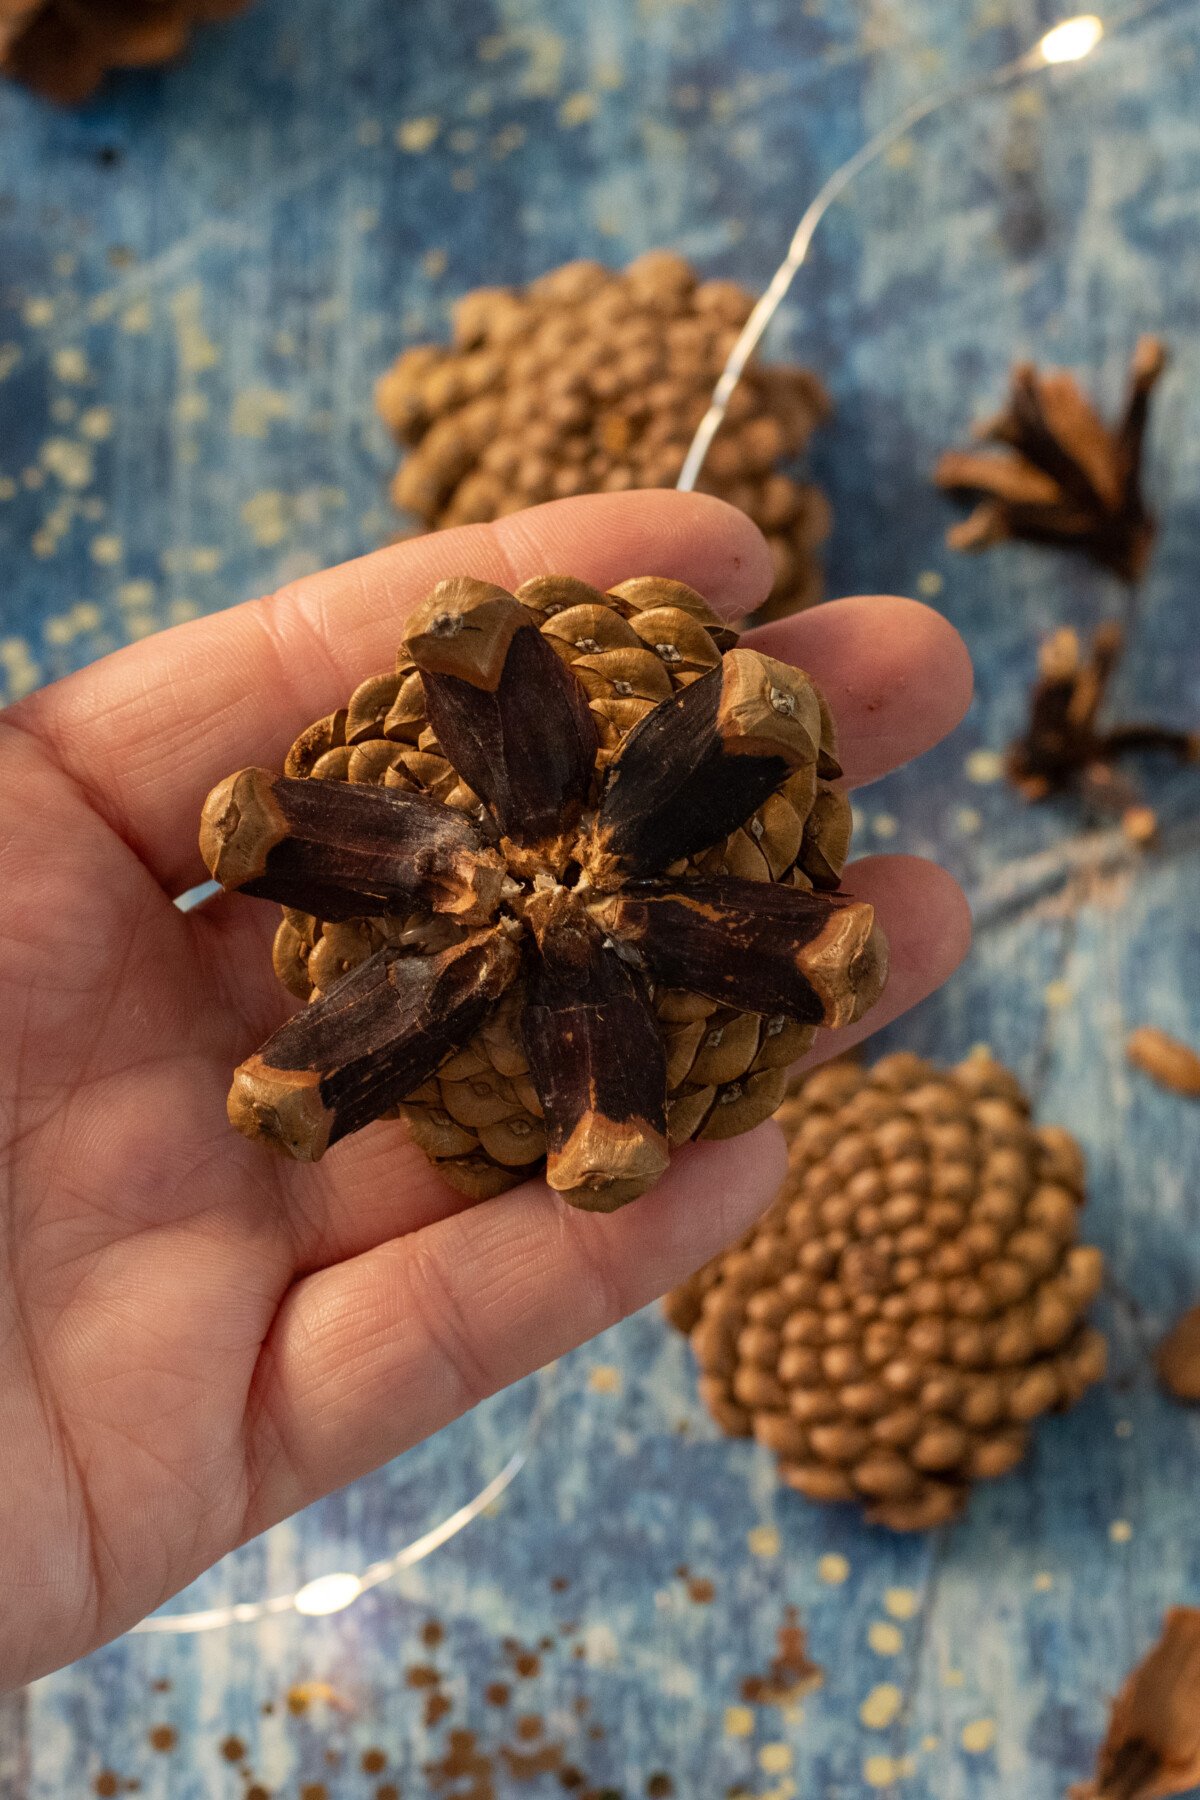
- Using hot glue, put a small circle of glue in the middle of the rosette. Working quickly, arrange individual pinecone petals, darker side up, in the circle. You should be able to fit five to six petals. Leave a small space at the center for the star-shaped top to sit.
- Once you’ve made your circle, put a dot of glue in the center and attach the star-shaped top of the pinecone.
- Allow the glue to set and remove any glue strings.
- Draw a leaf shape on a piece of paper and cut it out to use as a template. Trace and cut out leaves from the green felt.
- Arrange them however you like and glue them to the back of the flower.
- Finally, using another dot of hot glue, attach a bit of twine, ribbon or cord as a hanger.
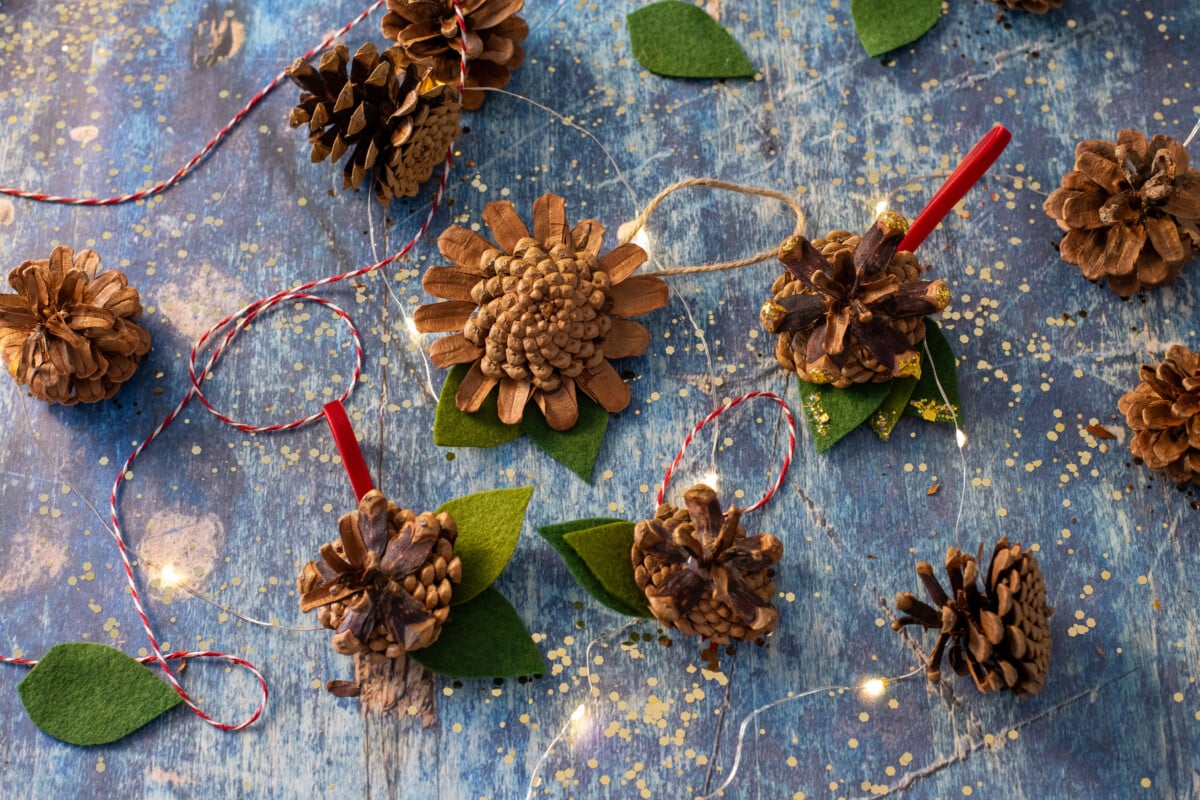
Now that you know how to make a simple flower, it’s time to get creative.
Change up the pattern by gluing petals in rows around the back of the rosette to make a sunflower-shaped ornament.
Add paint detail to the rosette and/or petals. Using a dry, stiff craft paint brush, dip your brush into a bit of the white paint and brush most of it off. Now, lightly brush the paint over the tops of the rosette from the edge inward. This will ensure you only catch the tops of the ridges going one way. You want to use a light hand. You can always go back in and add more paint if needed.

For glitter, do the same with a stiff craft paint brush, only use clear craft glue or glitter glue instead of white paint. You’ll want a slightly heavier hand here to give the glitter a good surface to stick to. After applying the glue, shake glitter onto the pinecone flower, turning to coat the entire surface. Gently tap off excess glitter and set the flower aside for the glue to dry.
Rustic twine not your thing? (Me either.) Here’s your chance to really make this craft your own. Red and white baker’s twine always looks great this time of year. For something a little more luxe, how about velvet ribbon?
Go all out with the leaves and embroider their borders and lines down the center of the leaf. This is easier to do if you embroider the outline of the leaf on your felt (using a running stitch) and then cut out the finished leaf.
Of course, now that you’ve made a few of these beautiful little pinecone flower ornaments, you’re probably wondering what else to do with them. Naturally, you should put a few on your Christmas tree, but don’t stop there.
Use them as:
- package toppers
- festive curtain tiebacks
- hang one on a doorknob
- You could even make enough to make a pinecone flower garland.
I hope you enjoy this holiday craft as much as I did. I’m already looking forward to collecting more pinecones so I can make more flowers.

Get the famous Rural Sprout newsletter delivered to your inbox.
Join the 50,000+ gardeners who get timely gardening tutorials, tips and tasks delivered direct to their inbox.